Battery box build and relocation
Moderator: Jim Walsh
-
- Posts: 437
- Joined: Aug 25th, '09, 17:03
- Location: CD33 "Prerequisite" / CD28 Flybridge Trawler "Toboggan"; Annapolis, MD
Battery box build and relocation
We purchased our boat with a very simple battery system- two Group 24 dual purpose batteries located in the port lazarette wired to a 1-2-Both switch. With a new auto pilot installed and plans for refrigeration in the coming year, it was time for a change. We decided to use four 6v batteries for a total of 460 amp hours in the house bank, a simple 12v starting battery as a reserve, and various upgrades to the charging systems. We decided to locate the new house battery box under the quarter berth. This post focuses on the physical location of the house bank.
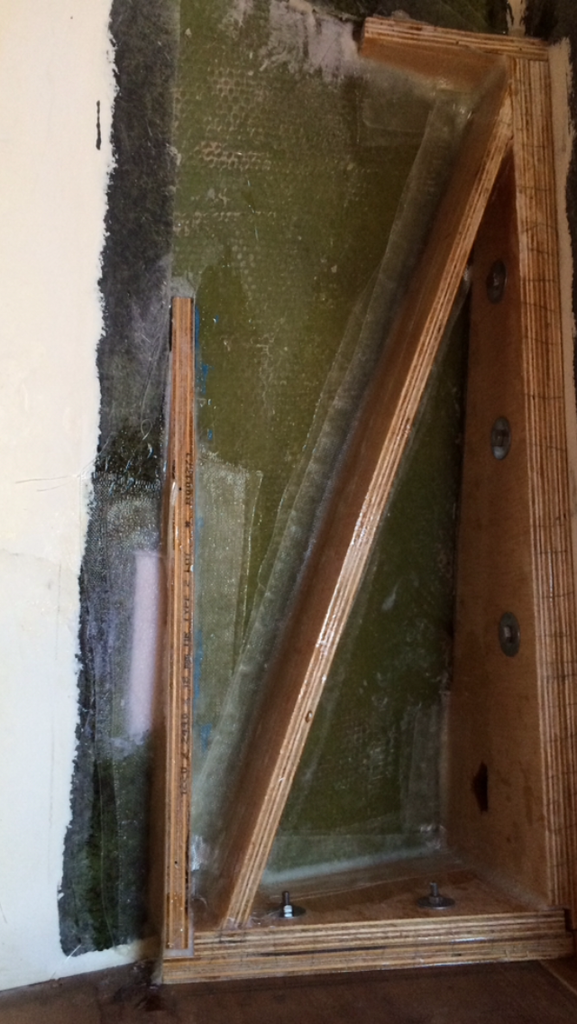
Hull liner cut out and support tabbed in. Note the hole cut in the long brace- that is for the drain hose:
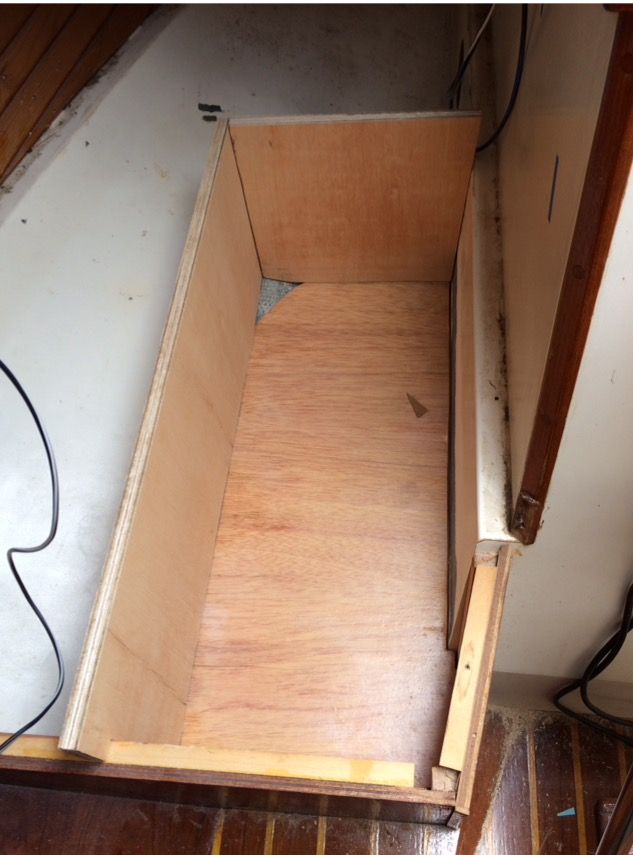
Box test fit. Rear outboard corner is cut out to allow for curvature of the hull:
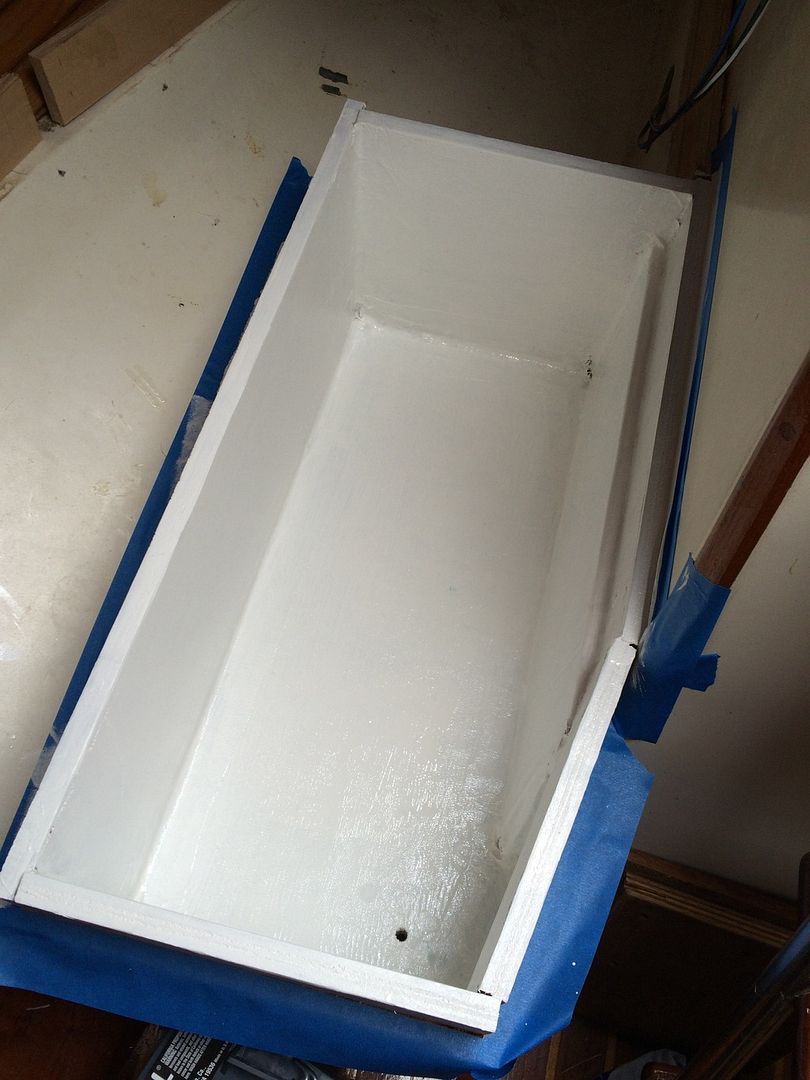
Box installed, lined with fiberglass and painted. The hole is actually a marelon through-hull that was flush fit and glassed over. It leads to an acid resistant hose then to a valve mounted high in the bilge so the box can be drained into a bucket if there is a leak:
Batteries test fit:
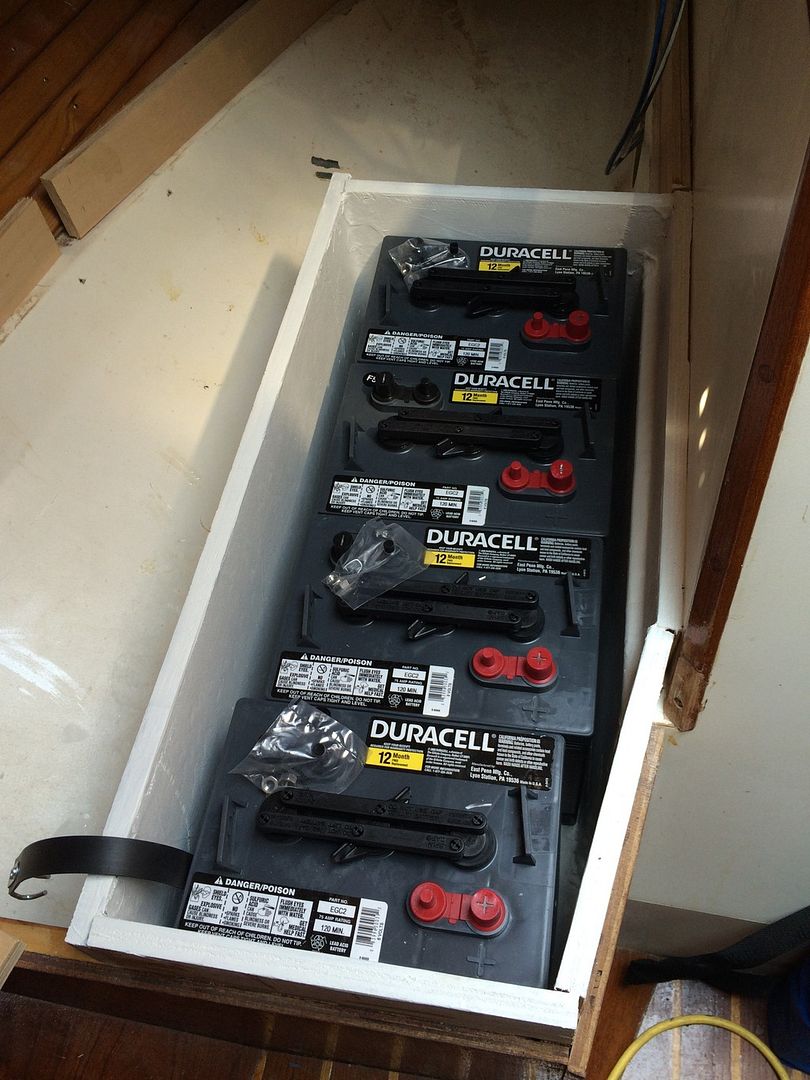
The quarter berth had to be raised 3" to allow for the height of the 6v batteries and to provide a small amount of clearance. The box itself serves as support for the berth at the new height. The rest of the plywood panel had risers attached:
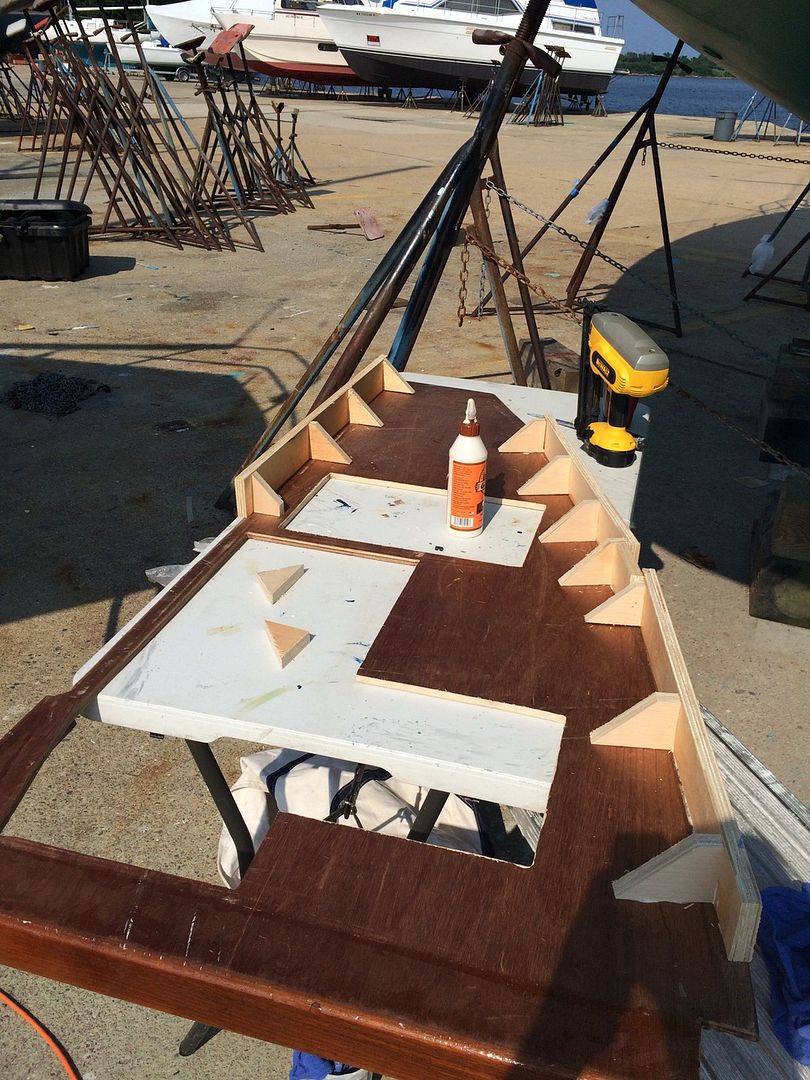
The old access holes aren't in the best location when combined with the new cutout, but the panel is still plenty stiff and doesn't seem to need additional bracing:
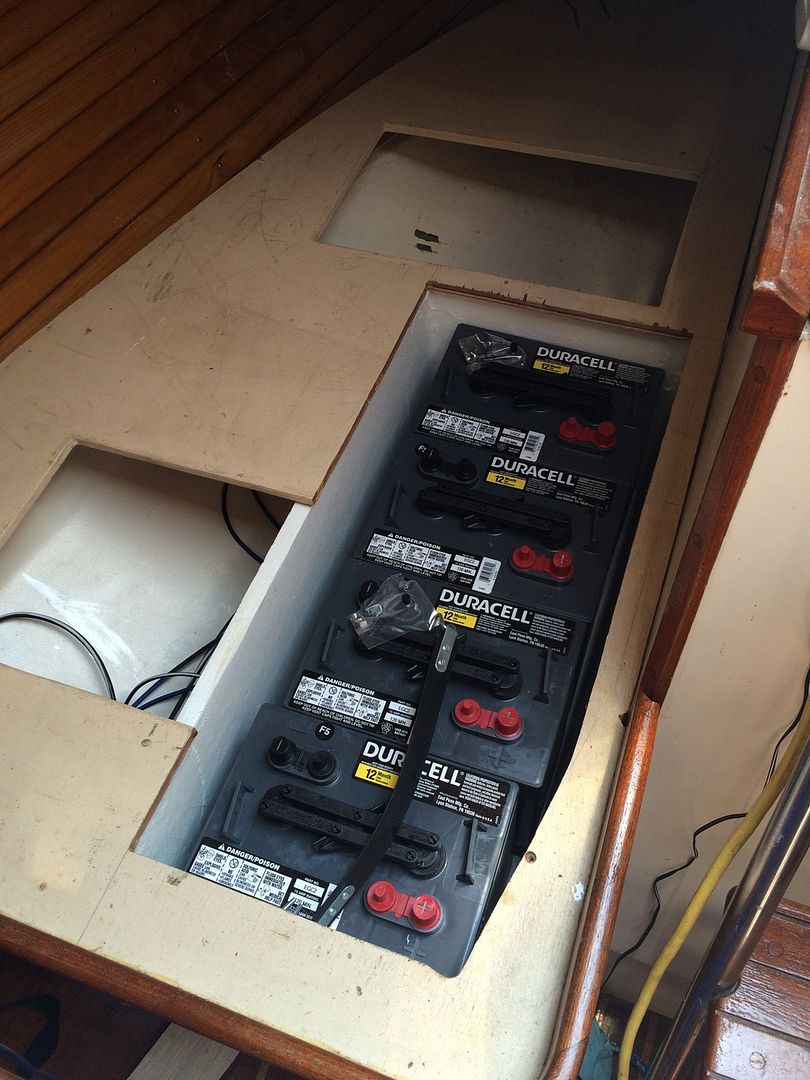
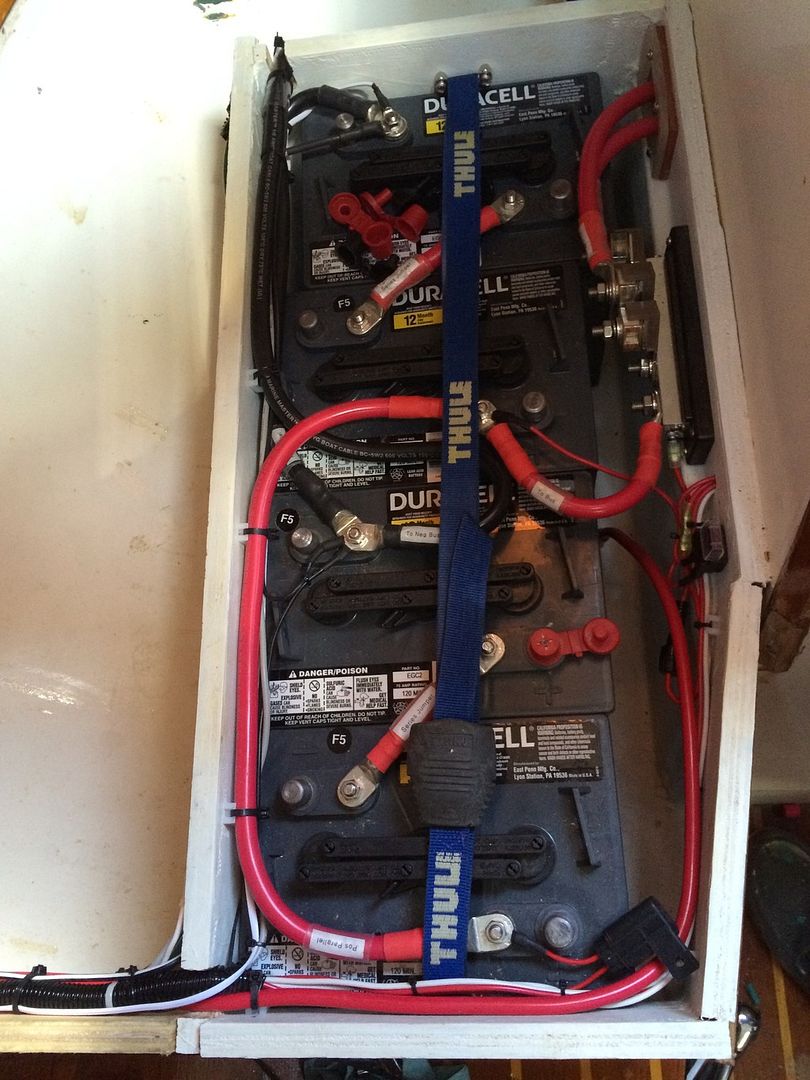
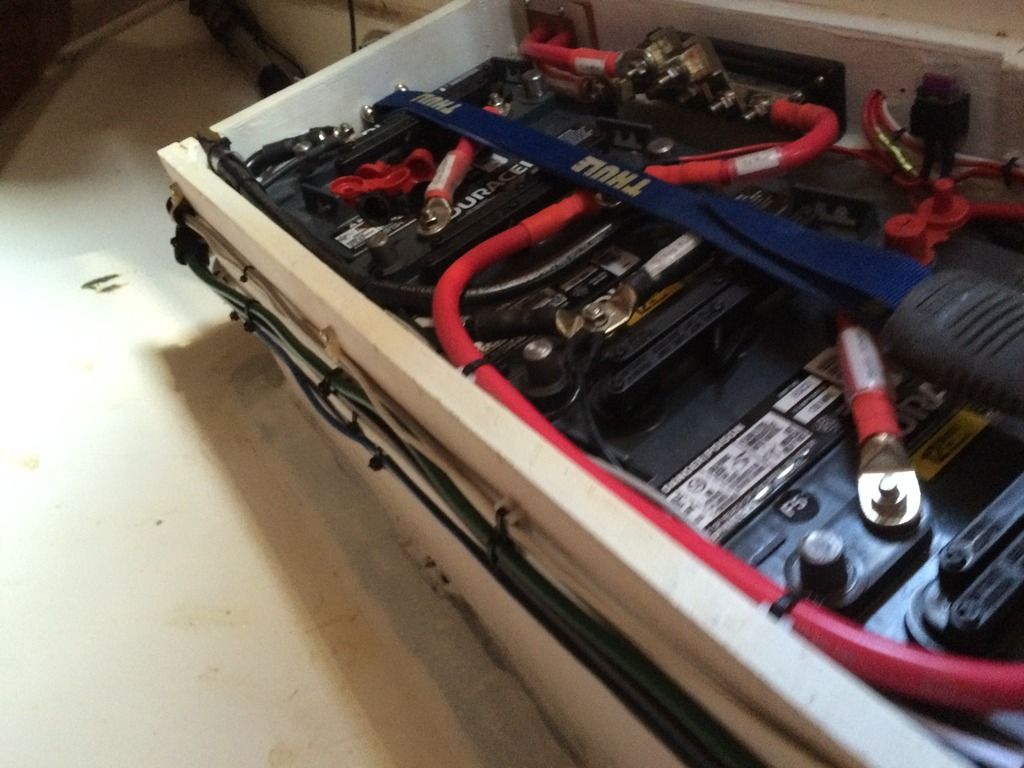
Overall, I think we'll be happy with the new bank and the access the new location provides for battery maintenance. There are still a few tasks left to do like make a lexan cover and install a venting system. Wiring the batteries is obviously high on the list. This is a very doable project if you spend some time planning it out. The new height still allows for a comfortable sitting position at the nav station and it doesn't look out of place.
Last edited by Jeff and Sarah on Jul 29th, '15, 06:35, edited 1 time in total.
Re: Battery box build and relocation
Very well documented project. Thoughtfully planned and implemented. I'm sure this will be helpful to others. Can't wait to see photo's once it's completed. Thanks for sharing.
Jim Walsh
Ex Vice Commodore
Ex Captain-Northeast Fleet
CD31 ORION
The currency of life is not money, it's time
Ex Vice Commodore
Ex Captain-Northeast Fleet
CD31 ORION
The currency of life is not money, it's time
Re: Battery box build and relocation
Nicely done! I'll be interested to hear about the upgrades to the charging system. What do you have planned? And has the weight of the batteries been considered, and a plan for keeping her on her lines? Thanks for posting this.
Rich W.
s/v CARAL (a tribute to Carl Alberg)
CD Typhoon #995 (useable project boat) (sold)
s/v Sadie
CD Typhoon #858
s/v Azure Leizure
IP 350 #120
Tiverton, RI
s/v CARAL (a tribute to Carl Alberg)
CD Typhoon #995 (useable project boat) (sold)
s/v Sadie
CD Typhoon #858
s/v Azure Leizure
IP 350 #120
Tiverton, RI
-
- Posts: 437
- Joined: Aug 25th, '09, 17:03
- Location: CD33 "Prerequisite" / CD28 Flybridge Trawler "Toboggan"; Annapolis, MD
Re: Battery box build and relocation
Thanks for the kind words. For charging I'll add a Sterling 40A charger, a solar array (that will have to wait for the new bimini frame though), and a new alternator & regulator. I'm deciding between the Balmar 80A or the 100A. I'm not sure I can fit the upgraded pulleys for a serpentine belt for the 100A (not to mention the additional cost). I also purchased a Xantrex Echo Charge to keep the reserve battery topped off. We will use the House bank for everything including starting but a reserve battery seemed like cheap insurance. Once it is all wired in I'll add some photos.
The boat always had a slight port list and she sat heavy on her lines. I removed 1 battery and a water heater from the port lazarette, and the new house bank is to starboard so I suspect the list may have transferred to the other side. There is lead from the factory tucked behind the starboard water tank so if need be, I'll simply move or remove that to adjust. The house bank is as far forward, as low, and as close to centerline as is really practical in a CD33 without ripping up the floor. That should help minimize the effects on pitch and list trim.
I also raised the waterline about 2.5" from the factory line. This should give me a slight reveal of the new bottom paint (we stripped all the old paint and gelcoat below the waterline all the way to bare fiberglass and did a full barrier coat). I'm heading to the yard now to finish painting the new boot stripe. I'll post pictures of that too in another thread (if it comes out well).
Re: Battery box build and relocation
I also raised my waterline slightly last fall. It was a big improvement. No more dirty boot top, ever! I took a tip gleaned from a Brit sailing forum and used bottom paint for my boot top rather than traditional boot top paint. Worked out great.Jeff and Sarah wrote:
I also raised the waterline about 2.5" from the factory line. This should give me a slight reveal of the new bottom paint (we stripped all the old paint and gelcoat below the waterline all the way to bare fiberglass and did a full barrier coat). I'm heading to the yard now to finish painting the new boot stripe. I'll post pictures of that too in another thread (if it comes out well).
http://www.capedory.org/board/viewtopic.php?f=9&t=32832
Jim Walsh
Ex Vice Commodore
Ex Captain-Northeast Fleet
CD31 ORION
The currency of life is not money, it's time
Ex Vice Commodore
Ex Captain-Northeast Fleet
CD31 ORION
The currency of life is not money, it's time
Re: Battery box build and relocation
Fantastic project! I'm looking forward to your progress and photos. Thank you for posting.
Rich W.
s/v CARAL (a tribute to Carl Alberg)
CD Typhoon #995 (useable project boat) (sold)
s/v Sadie
CD Typhoon #858
s/v Azure Leizure
IP 350 #120
Tiverton, RI
s/v CARAL (a tribute to Carl Alberg)
CD Typhoon #995 (useable project boat) (sold)
s/v Sadie
CD Typhoon #858
s/v Azure Leizure
IP 350 #120
Tiverton, RI
-
- Posts: 437
- Joined: Aug 25th, '09, 17:03
- Location: CD33 "Prerequisite" / CD28 Flybridge Trawler "Toboggan"; Annapolis, MD
Re: Battery box build and relocation
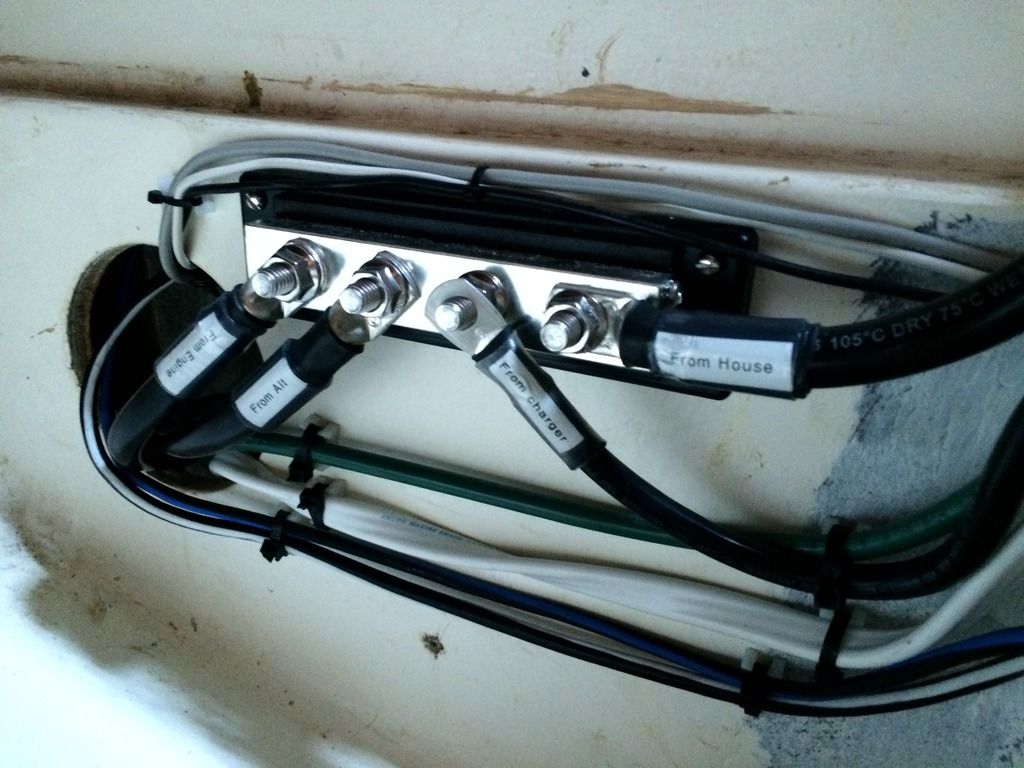
The install is about 98% complete. We just returned from the first real sea trial of the alternator and it performed flawlessly (which made me even more ready for an instant and unannounced breakdown). We ended up using a 120 Amp Balmar alternator. I have the external regulator set to Belt Manager mode 5 which derates the alternator 25% down to 90 amps. This seems to be a good choice so far as the alternator ran cool the entire time. The highest output I saw while checking it intermittently was around 78 amps. The photos don't show a 100% complete project because I haven't wired in the shore charger yet thought the wires are all run to the right areas.
[/URL]
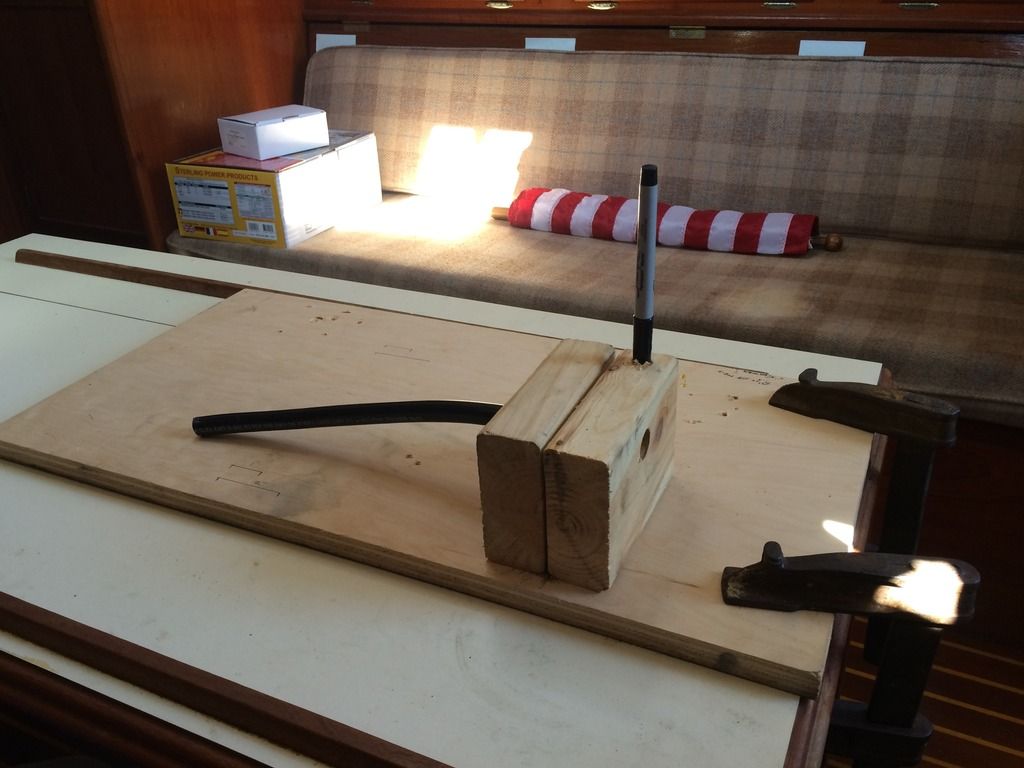
My wire cutting rig (with a scrap piece of cable inserted for reference). The two blocks are just far enough for the hacksaw blade to fit. You can also see a couple lines drawn on the wood for quick reference when stripping insulation and cutting shrink wrap:
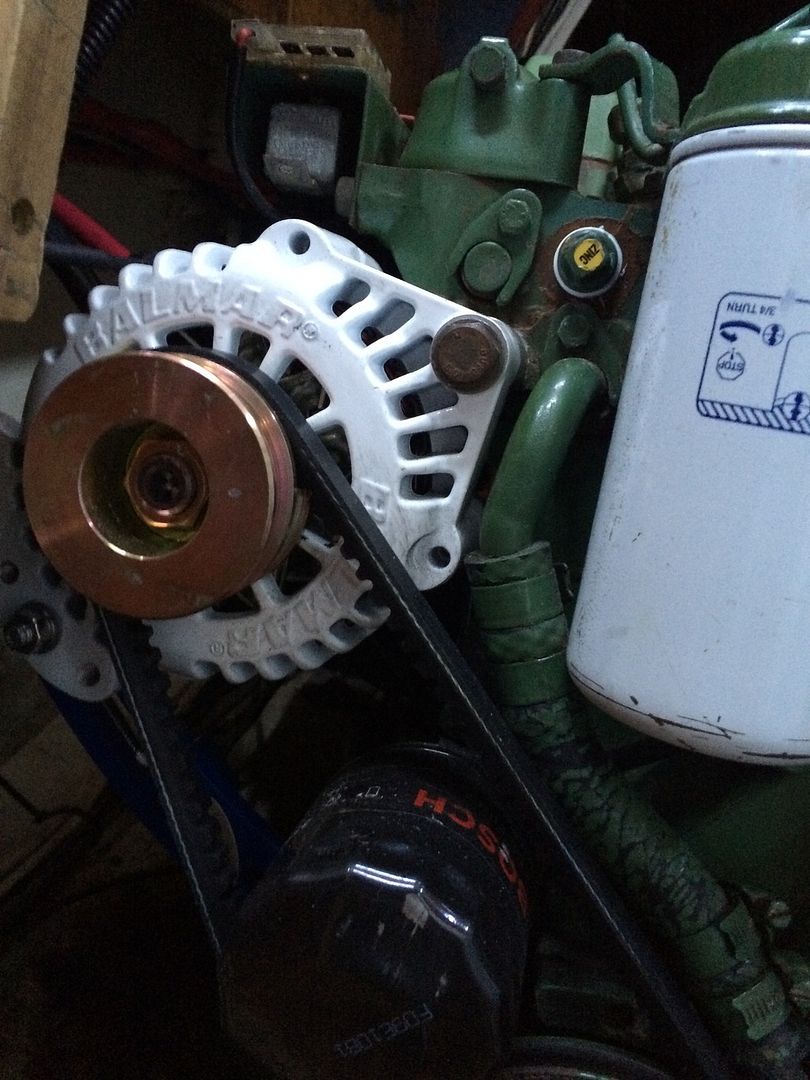
The alternator bracket took some modification and the tensioning system has to go in the back and under the alternator- still better than nothing but just barely. You can see the alternator has a dual pulley and I'm only running 1 belt. I'm actively searching for a second pulley for the ol' Volvo Penta 2003 but until I find one, it seems to run just fine on a single belt (especially with the alternator derated). I did need a shorter belt than the stock Volvo part because of how the alternator sits compared to the old one.
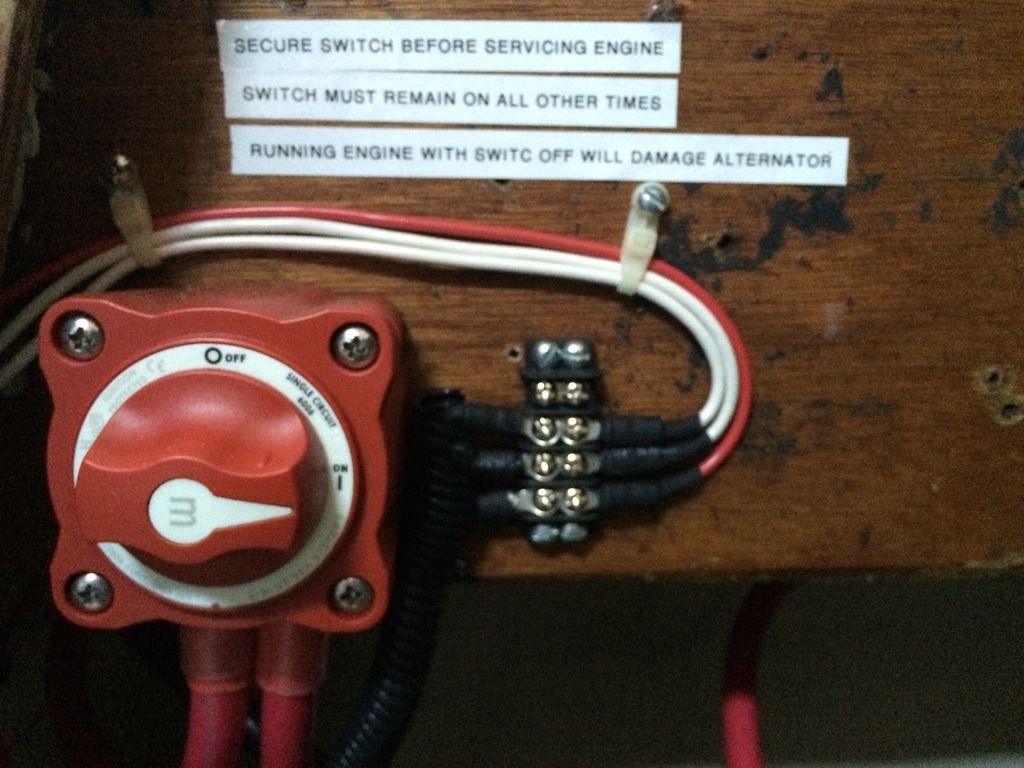
The alternator is wired directly to the house bank so I added a switch in the engine compartment. Forgot to turn it off once and yes- I caused some sparks! Also, it wouldn't be me if there weren't a typing error or two (label makers don't have spell check)! The terminal strip is for the external regulator.
- Sea Hunt Video
- Posts: 2561
- Joined: May 4th, '11, 19:03
- Location: Former caretaker S/V Bali Ha'i 1982 CD 25D; Hull 69 and S/V Tadpole Typhoon Week
Re: Battery box build and relocation
Sarah and Jeff:
Did you buy or make the wiring labels
If bought, where from
If made, how
Thanks
Did you buy or make the wiring labels
If bought, where from
If made, how
Thanks
Fair winds,
Roberto
a/k/a Sea Hunt "The Tadpole Sailor"
CDSOA #1097
________________________________
"I wish to have no Connection with any Ship that does not Sail fast for I intend to go in harm's way." Captain John Paul Jones, 16 November 1778, as quoted in Naval History and Heritage Command, http://www.history.navy.mil
-
- Posts: 437
- Joined: Aug 25th, '09, 17:03
- Location: CD33 "Prerequisite" / CD28 Flybridge Trawler "Toboggan"; Annapolis, MD
Re: Battery box build and relocation
I made them with a Brother brand label maker and used clear shrink wrap over them. I may have provided the monkey skills, but everybody's pal Maine Sail provided the instruction:
http://www.pbase.com/mainecruising/wire_labeling
Re: Battery box build and relocation
Real nice work. Bravo.
Jim Walsh
Ex Vice Commodore
Ex Captain-Northeast Fleet
CD31 ORION
The currency of life is not money, it's time
Ex Vice Commodore
Ex Captain-Northeast Fleet
CD31 ORION
The currency of life is not money, it's time