Way overdue project photos - typhoon #108
Moderator: Jim Walsh
-
grajmahal
- Posts: 23
- Joined: Mar 30th, '10, 09:53
- Location: typhoon weekender #108 (work in progress)
Way overdue project photos - typhoon #108
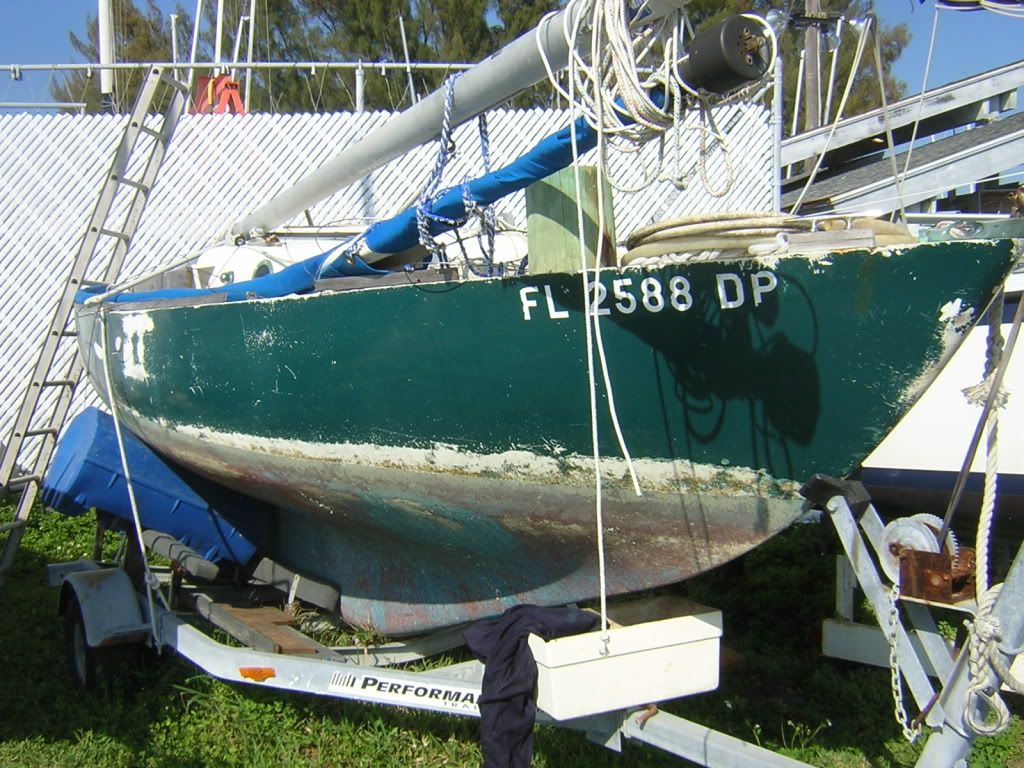
Greetings all. I have been meaning to get some photos up of my ongoing (4 years now) Typhoon Weekender build, and finally found both the time and the camera. Here is a starter - what she looked like when I found her rotting away in a Florida boatyard in 2008, slathered in hunter green housepaint and blistered almost through her hull. She had been on a mooring when a hurricane hit (from what I understood) and sustained extensive hull damage from rubbing up against something. Every inch of gelcoat was badly crazed and chalky - she needed a full strip and re-do on deck, topsides, and below the waterline. Only a fool would take on such a task. More photos to follow. JB
-
grajmahal
- Posts: 23
- Joined: Mar 30th, '10, 09:53
- Location: typhoon weekender #108 (work in progress)
More photos of hull #108 refit
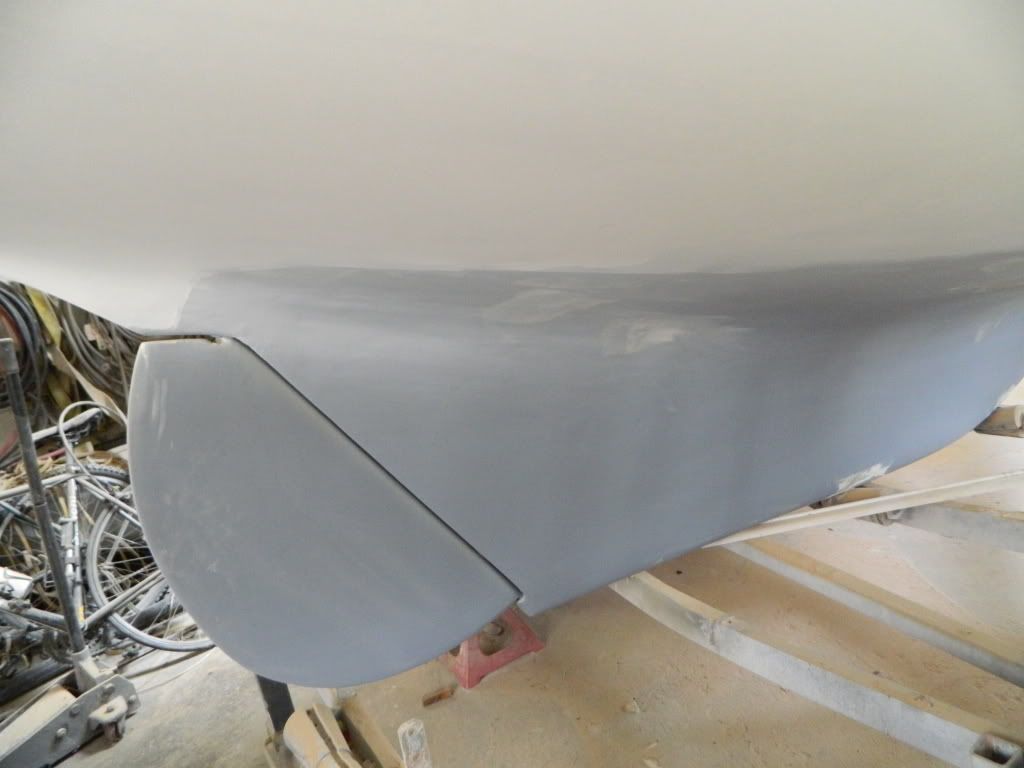
I don't have photos of the grind-down process, but I used an angle grinder and removed every ounce of gelcoat on the entire exterior of the boat. This took me (on and off) the better part of a year, probably consuming a couple hundred hours in the process, not to mention numerous Tyvek suits, piles of grinding disks, and days of itchy forearms. It was a very unpleasant task. From there, I built up a layer of cloth with epoxy on the deck, and just with thickened epoxy on the hull. I make myself a 3 foot by 4 inch longboard for doing the fairing sanding, and applied the epoxy with large drywall knives. Sanding took forever.
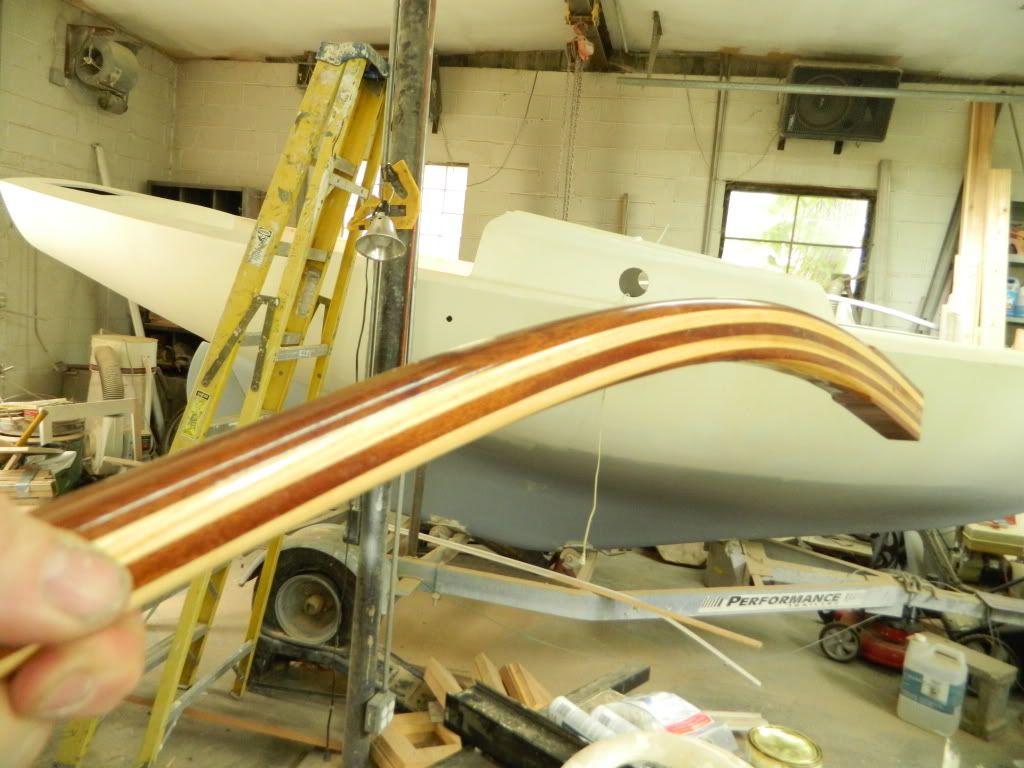
I removed the rudder and re-built it, welding shut the hole in the bronze shoe and having it re-bored by a machinist friend for a more precise fit of the rudder shaft. I enjoy doing woodwork, so I couldn't resist making myself a mahogany and ash tiller:
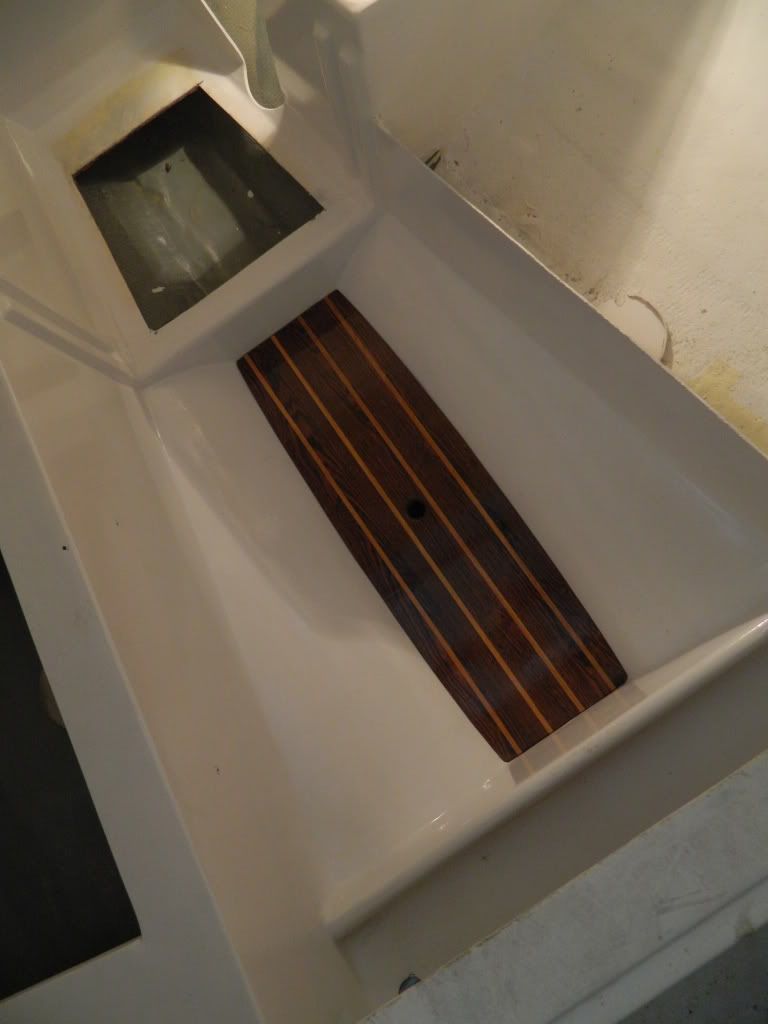
Although you can't hope for standing headroom in an 18 foot boat, I found the sole to be too high in this boat for my comfort, so I cut out the fiberglass one and faired out the inside of the keel sweep. I laminated in a couple of wooden stops, and made up this traditional-looking sole to finish it off. That isn't Teak and holly, although that was the look I was going for. I happened to have some Bocote (Mexican Rosewood) and Lyptus, so I made it out of them. I love the look, and although it is not in the photo, I used the same thing for the sole under the head.
I added a bunch of bulkheads, all made out of 2" extruded polystyrene insulation board sandwiched between layers of fiberglass cloth and epoxy. First, I put a chain locker in the bow:
Then, moving aft, I put a foreward locker in the cabin (shown here with its veneer of teak ply. I plan to make small hatches for the locker openings) .
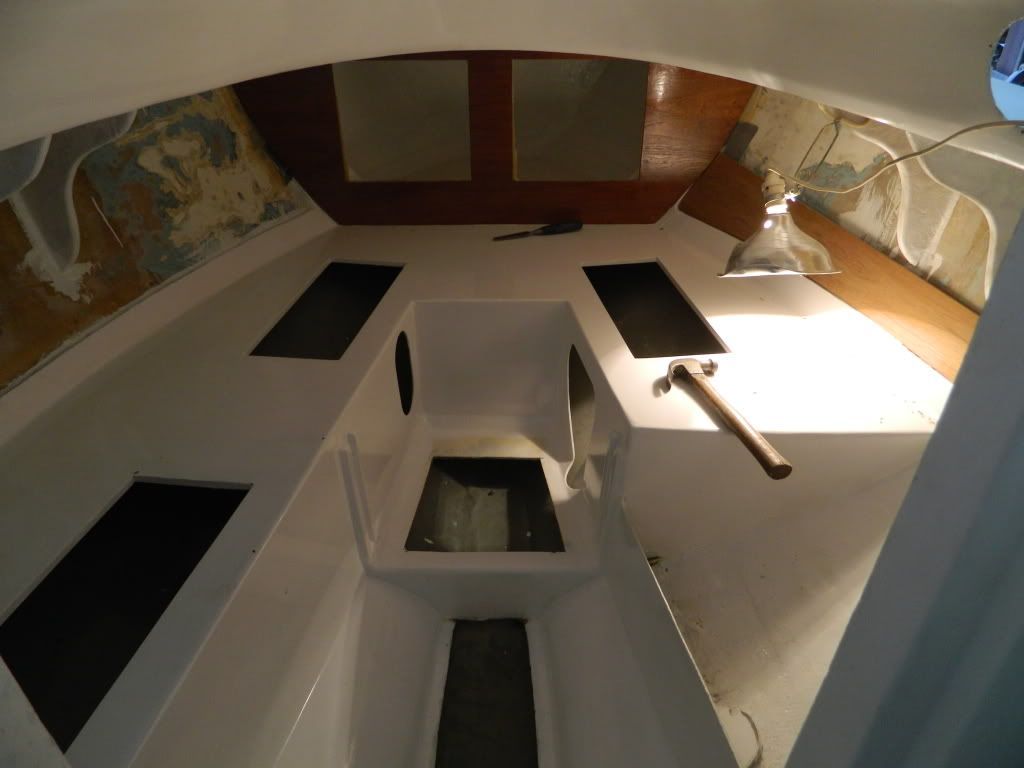
Moving aft, I isolated the cabin from the lazarettes. This open design has always annoyed me about these boats - as it came from the factory, any piece of gear put in the lazarette could roll as far as the bow or the stern; that made the lockers pretty useless. This bulkhead, and an aft one just at the rear of the cockpit, make the lazarette spaces into proper lockers. Here is a terrible photo, :

As it is "America's littlest Yacht", I thought it only propert that it have not only a head, but also a galley. Here you can see a bit of the teak interior being installed, and the cutaway from the starboard side bunk that will become the galley. My plan is to have a section of the bunk cushion removable for cooking, and still be able to replace it to use the space as a bunk:
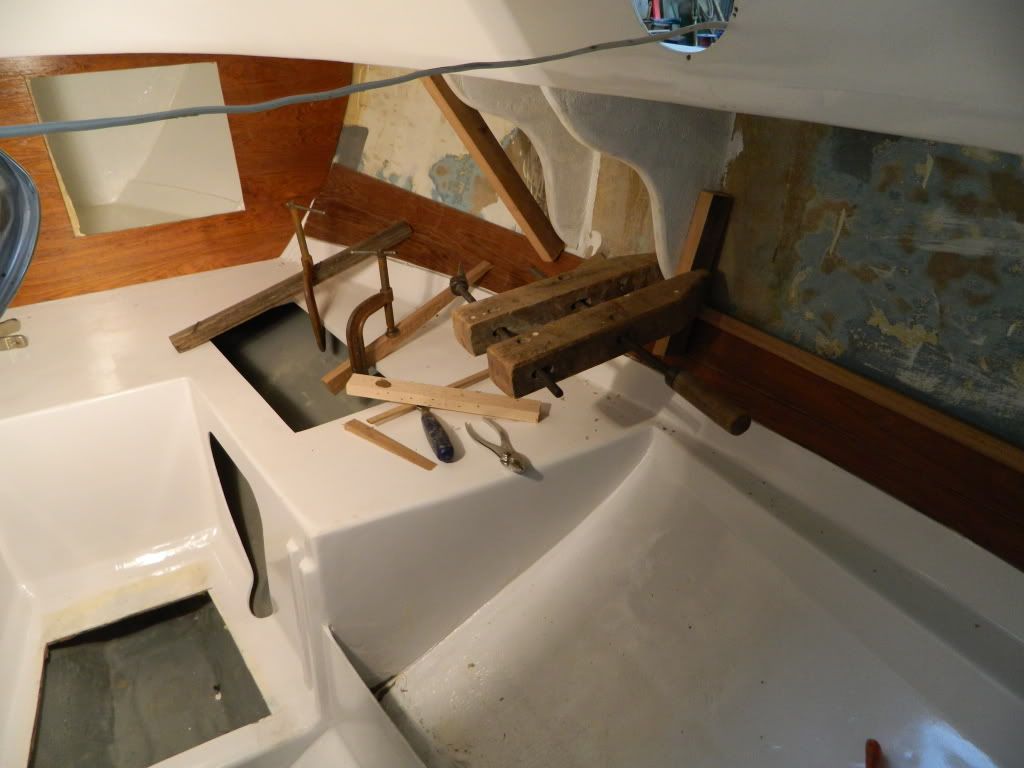
The lazarette hatches were shaped like bananas when I got the boat, so I straightened them up with some Western Red Cedar spines and a few layers of cloth. The additional wood blocks are the mounting pads for the hidden hinges.
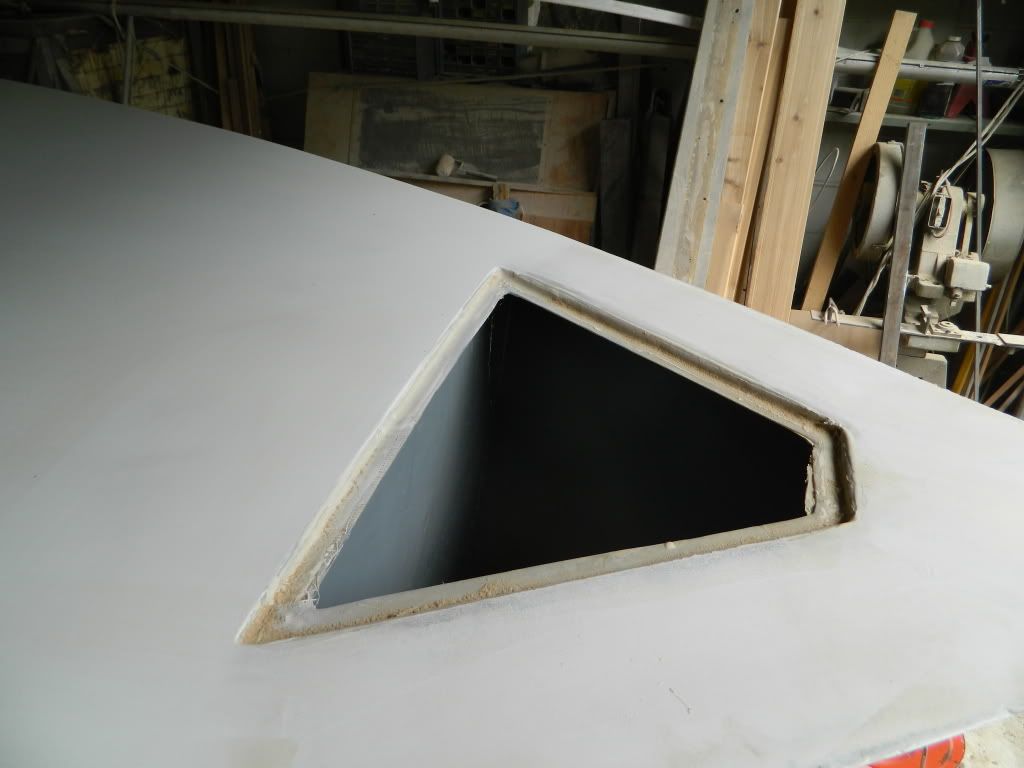
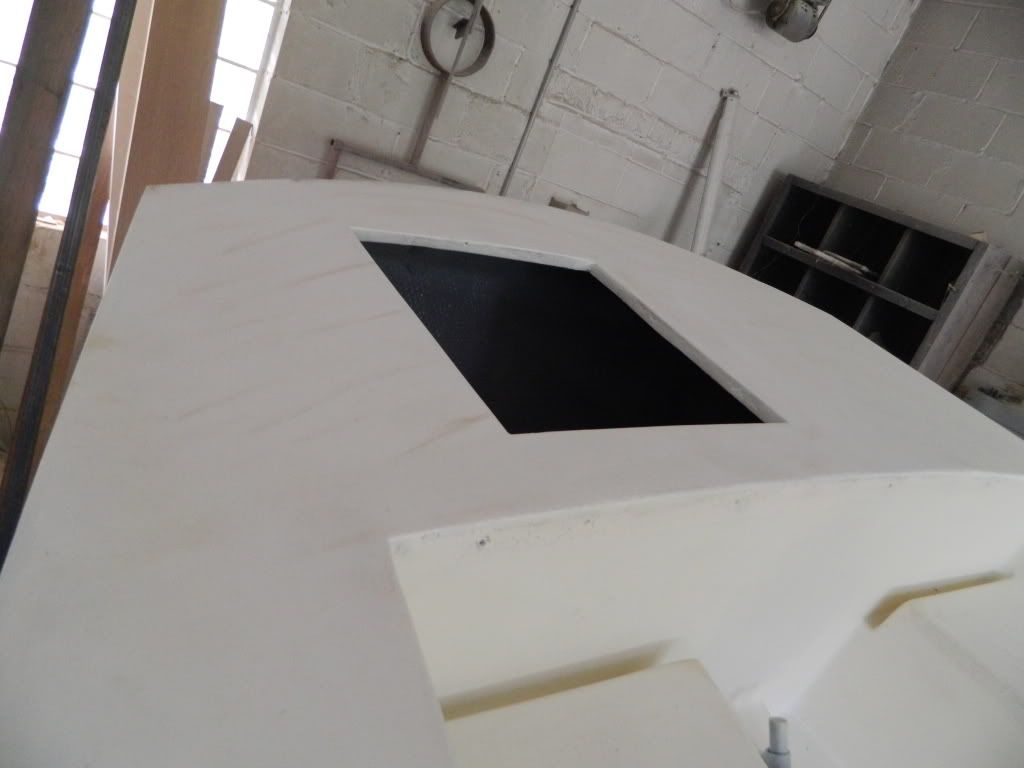
Taking a page from other Typhoon owners, I turned the taffrail cavity into an outboard locker. There was a lot of core rot on this part of the deck (and also on the bow, which is almost entirely new), so cutting into it was hardly a sin. This also allowed me to fill the fastener areas with solid epoxy to minimize the risk of future core rot.
Finally, I happened upon a Craigslist ad for 1/4" sheets of Teak plywood, so the interior is going to be about as retro as can be. 3" strips of Teak ply with beveled edges, epoxied to the hull, approximate a lapstrake interior without adding much weight.
Thanks for taking my little tour. My plan is to get this lady in the water yet this year, so there should be some more photos forthcoming soon. And, if you happen to watch DIY network's "rehab addict" show, they filmed in my workshop last year and she appears as the backdrop in some episodes that are currently airing.
I removed the rudder and re-built it, welding shut the hole in the bronze shoe and having it re-bored by a machinist friend for a more precise fit of the rudder shaft. I enjoy doing woodwork, so I couldn't resist making myself a mahogany and ash tiller:
Although you can't hope for standing headroom in an 18 foot boat, I found the sole to be too high in this boat for my comfort, so I cut out the fiberglass one and faired out the inside of the keel sweep. I laminated in a couple of wooden stops, and made up this traditional-looking sole to finish it off. That isn't Teak and holly, although that was the look I was going for. I happened to have some Bocote (Mexican Rosewood) and Lyptus, so I made it out of them. I love the look, and although it is not in the photo, I used the same thing for the sole under the head.
I added a bunch of bulkheads, all made out of 2" extruded polystyrene insulation board sandwiched between layers of fiberglass cloth and epoxy. First, I put a chain locker in the bow:
Then, moving aft, I put a foreward locker in the cabin (shown here with its veneer of teak ply. I plan to make small hatches for the locker openings) .
Moving aft, I isolated the cabin from the lazarettes. This open design has always annoyed me about these boats - as it came from the factory, any piece of gear put in the lazarette could roll as far as the bow or the stern; that made the lockers pretty useless. This bulkhead, and an aft one just at the rear of the cockpit, make the lazarette spaces into proper lockers. Here is a terrible photo, :
As it is "America's littlest Yacht", I thought it only propert that it have not only a head, but also a galley. Here you can see a bit of the teak interior being installed, and the cutaway from the starboard side bunk that will become the galley. My plan is to have a section of the bunk cushion removable for cooking, and still be able to replace it to use the space as a bunk:
The lazarette hatches were shaped like bananas when I got the boat, so I straightened them up with some Western Red Cedar spines and a few layers of cloth. The additional wood blocks are the mounting pads for the hidden hinges.
Taking a page from other Typhoon owners, I turned the taffrail cavity into an outboard locker. There was a lot of core rot on this part of the deck (and also on the bow, which is almost entirely new), so cutting into it was hardly a sin. This also allowed me to fill the fastener areas with solid epoxy to minimize the risk of future core rot.
Finally, I happened upon a Craigslist ad for 1/4" sheets of Teak plywood, so the interior is going to be about as retro as can be. 3" strips of Teak ply with beveled edges, epoxied to the hull, approximate a lapstrake interior without adding much weight.
Thanks for taking my little tour. My plan is to get this lady in the water yet this year, so there should be some more photos forthcoming soon. And, if you happen to watch DIY network's "rehab addict" show, they filmed in my workshop last year and she appears as the backdrop in some episodes that are currently airing.
-
Sea Hunt Video

- Posts: 2561
- Joined: May 4th, '11, 19:03
- Location: Former caretaker S/V Bali Ha'i 1982 CD 25D; Hull 69 and S/V Tadpole Typhoon Week
Re: Way overdue project photos - typhoon #108
JB:
Amazing, absolutely amazing. The only downside is that looking at your restoration pictures and those of a few others on this board reinforces in me how inadequate my skills are in this area.
Great job
Amazing, absolutely amazing. The only downside is that looking at your restoration pictures and those of a few others on this board reinforces in me how inadequate my skills are in this area.
Great job
Fair winds,
Roberto
a/k/a Sea Hunt "The Tadpole Sailor"
CDSOA #1097
________________________________
"I wish to have no Connection with any Ship that does not Sail fast for I intend to go in harm's way." Captain John Paul Jones, 16 November 1778, as quoted in Naval History and Heritage Command, http://www.history.navy.mil
-
Joe M

- Posts: 79
- Joined: Oct 17th, '10, 13:02
- Location: 1984 CD Typhoon "Itilldoo" & CD10 No.315 Cape May, NJ
- Contact:
Re: Way overdue project photos - typhoon #108
Nice!...you are truely a craftsman. Well done.
(visit: www.joemilliganartist.com)
-
Dick Villamil
- Posts: 456
- Joined: Feb 6th, '05, 16:42
- Location: CD Typhoon, Victoria, Essex Jct. VT
Re: Way overdue project photos - typhoon #108
Nice work! I restored my 1976 Ty and had I seen your ideas I may have incorporated a few of them in the restoration! I did install a removable mast support in the cabin. I also use low coca-cola trays for anchor and lines etc. in the lazarettes - keeps everything more or less organized. I may try a bulkhead but I may also might like to try my skills at installing internal locker spaces. Now I have to figure out how to attach photos! I left the original gelcoat in place but did some major repairing of the stress and shrinkage cracks before using the 2-part epoxy barrier coat.
Re: Way overdue project photos - typhoon #108
Wow! Amazing project.
-
sfreihofer
- Posts: 223
- Joined: Dec 6th, '07, 22:05
- Location: 1981 Cape Dory 25 #794, S/V PEARL
- Contact:
Re: Way overdue project photos - typhoon #108
Beautifully executed work! I love to see it when someone appreciates the value of these neglected old boats and restores them to their former elegance. These are classics, and you've done your little yacht proud! Congratulations!
Instant Bubble-head. Just add water.
Re: Way overdue project photos - typhoon #108
Goodness, your gonna have a $100,000 Ty when complete.... Looking forward to seeing more pix... Do you plan on changing anything about the rig or sail area?
Gather ye Rosebuds while ye may, ole time is a flying... the same flower that smiles to day, to morrow will be dying...
-
grajmahal
- Posts: 23
- Joined: Mar 30th, '10, 09:53
- Location: typhoon weekender #108 (work in progress)
Re: Way overdue project photos - typhoon #108
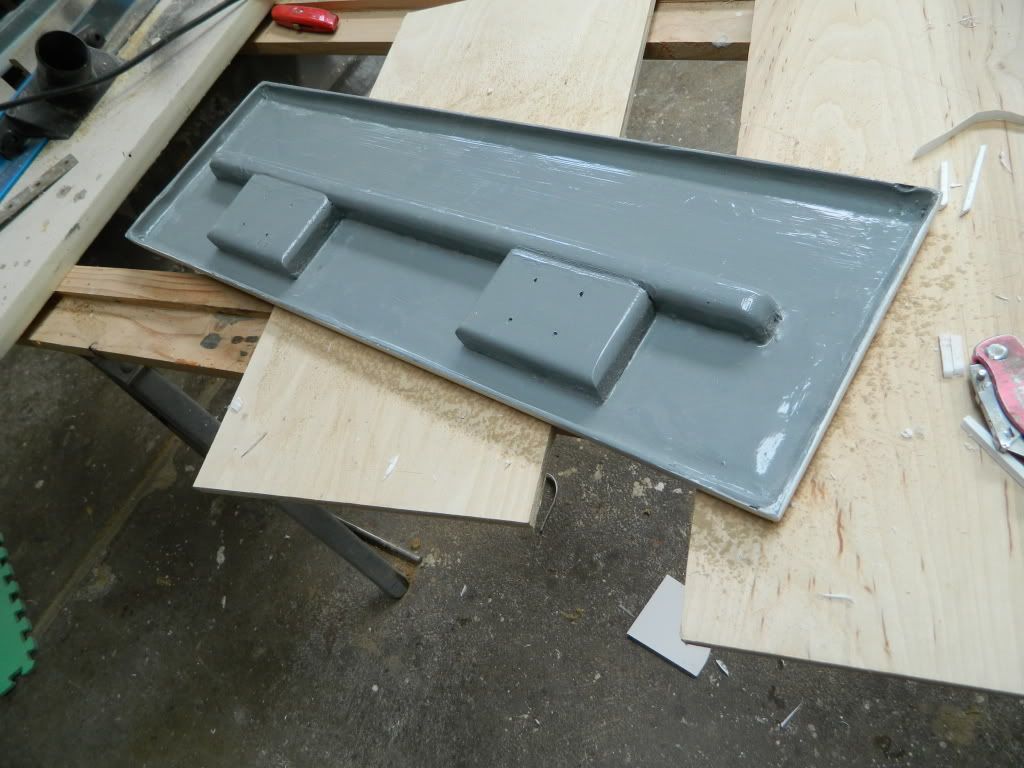
Companionway hatch/spray hood. This is the original flimsy fiberglas unit, with four layers of cloth added to the inside for strength, and 3/16" of African mahogany added to the top for looks. I longboarded and blocked the mahogany to get it reasonably fair, and then began building up coats of Schooner Gold spar varnish, with 320 grit wetsanding between coats. This is about coat #9, and it is dry in this photo.

Re: Way overdue project photos - typhoon #108
wow! beautiful!
-
tjr818

- Posts: 1851
- Joined: Oct 13th, '07, 13:42
- Location: Previously owned 1980 CD 27 Slainte, Hull #185. NO.1257949
Re: Way overdue project photos - typhoon #108
Stunning!
I hope I can build one of those this winter. Do you have any pictures of the building process?
I hope I can build one of those this winter. Do you have any pictures of the building process?
Tim
Nonsuch 26 Ultra,
Previously, Sláinte a CD27
Nonsuch 26 Ultra,
Previously, Sláinte a CD27
-
ChrisClapp
- Posts: 1
- Joined: Oct 4th, '10, 13:46
- Location: Cape Dory Typhoon
Re: Way overdue project photos - typhoon #108
Nice work!!
Looking at a similar process myself. How are you laying out the rigging on the aft deck now that you have that beautiful hatch?
Looking at a similar process myself. How are you laying out the rigging on the aft deck now that you have that beautiful hatch?
-
grajmahal
- Posts: 23
- Joined: Mar 30th, '10, 09:53
- Location: typhoon weekender #108 (work in progress)
Re: Way overdue project photos - typhoon #108
Thanks Chris! The taffrail hatch opening doesn't get to the centerline, so I still have room for the factory standing rigging padeye. As for running rigging, i am running a Harken small-boat traveler across the front edge of the taffrail deck where it falls into the cockpit.
I just got my scond coat of Perfection on a few nights ago. I should have some new photos to post in the next few weeks with something shiny to show.
John
I just got my scond coat of Perfection on a few nights ago. I should have some new photos to post in the next few weeks with something shiny to show.
John
-
Jeff and Sarah
- Posts: 437
- Joined: Aug 25th, '09, 17:03
- Location: CD33 "Prerequisite" / CD28 Flybridge Trawler "Toboggan"; Annapolis, MD
Re: Way overdue project photos - typhoon #108
I'm sitting in El Salvador right now watching one of the few English channels I get and I'm pretty sure I just saw this boat in a home renovation tv show I'm watching. Are you the "woodworker friend" who made the fireplace mantle?
-
grajmahal
- Posts: 23
- Joined: Mar 30th, '10, 09:53
- Location: typhoon weekender #108 (work in progress)
Re: Way overdue project photos - typhoon #108
Wow, El Salvador. I had no idea. And yes, I am "JB", and you spotted the boat! Good eye. It has come a long way since that shoot, with a new Interlux Perfection paint job on deck and a lot of wood and hardware that followed. I enjoy the wood part way more than the fiberglass part.
Do you have a boat down there?
John
Do you have a boat down there?
John