Espar Heater in CD36 advice
Moderator: Jim Walsh
-
Randy Capstick
- Posts: 109
- Joined: Feb 6th, '05, 19:55
- Location: 1980 Ty Weekender, 1984 CD36 Glen Margaret, Nova Scotia, Canada
Espar Heater in CD36 advice
Looking for installation advice for an Espar forced air heater on my 1984 CD36. I'm wondering where best to install heater and route ducting/exhaust etc. I seem to remember Russell had detailed his installation on his Lady Pauline website years ago but website is no longer active and my attempts to send him a PM have been unsuccessful. I'm thinking of installing heater in either hanging locker or under Port Settee. Any assistance from CD36 owners with either Espar or Webasto heaters installed would be appreciated. Pictures would be great also.
Thanks,
Randy
Thanks,
Randy
- bottomscraper
- Posts: 1400
- Joined: Feb 5th, '05, 11:08
- Location: Previous Owner of CD36 Mahalo #163 1990
- Contact:
Re: Espar Heater in CD36 advice
We have a late 1990 vintage 36. The main part of our Espar is installed under the side deck outboard of the port cockpit seat. It's above where our batteries are installed. The exhaust runs directly aft with the port high on the stern. The hot supply duct runs forward on the port side behind the dish storage. There is a "T" with one duct in the main cabin facing inboard under the galley sink. The duct continues forward behind the port settee. There is a second "T" with a duct in the head and the last duct low in the V berth. We don't have any real return ducting, just a vent in the back of the quarter berth, so basically the entire engine compartment acts a s a huge return duct. It keeps us toasty warm. If we get a break in the rain I will try to get some pictures but most of the duct work is very well hidden. I may be able to get some pictures of the main unit although that will be a bit of blind shooting since getting into the locker is one of my least favorite adventures.
P.S.
FYI our current Espar is a D4 which replaced an earlier D3L. The new unit was installed in 2015 using most of the old ductwork. I believe the D3L was original to the boat so 24 years was a good run! The D4 is quieter and works better (smart thermostat and variable speed fan).
P.S.
FYI our current Espar is a D4 which replaced an earlier D3L. The new unit was installed in 2015 using most of the old ductwork. I believe the D3L was original to the boat so 24 years was a good run! The D4 is quieter and works better (smart thermostat and variable speed fan).
Rich Abato
Nordic Tug 34 Tanuki
Previous Owner Of CD36 Mahalo #163
Southern Maine
http://www.sailmahalo.com
Nordic Tug 34 Tanuki
Previous Owner Of CD36 Mahalo #163
Southern Maine
http://www.sailmahalo.com
-
Randy Capstick
- Posts: 109
- Joined: Feb 6th, '05, 19:55
- Location: 1980 Ty Weekender, 1984 CD36 Glen Margaret, Nova Scotia, Canada
Re: Espar Heater in CD36 advice
Thanks Rich, I appreciate your help.
Randy
Randy
- bottomscraper
- Posts: 1400
- Joined: Feb 5th, '05, 11:08
- Location: Previous Owner of CD36 Mahalo #163 1990
- Contact:
Re: Espar Heater in CD36 advice
Here are some pictures.
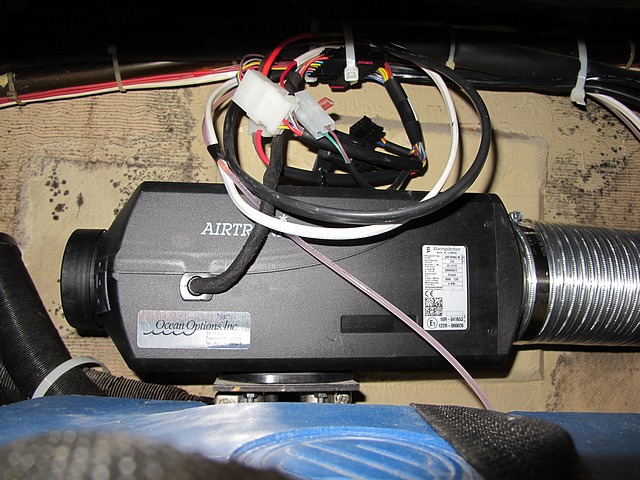
This is the main unit. The hot air duct is exiting to the right. Cold air comes in from the left. Exiting from the bottom are the hot exhaust and the burner air intake muffler. This is all mounted high in the port cockpit locker. The blue thing on the bottom is a battery box for 2 golf cart batteries. The wires were left a bit long because working in that compartment is no fun at all.
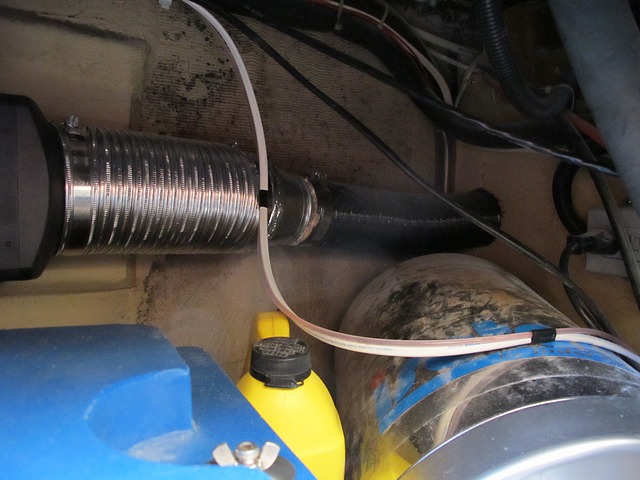
This shows the forward end of the main unit and the hot air duct. Note the reducer. When we installed this new unit the hot air duct is a larger size than we had on the old one. Ocean Options recommended running the larger size duct up to the first "Y". This wasn't really practical (I installed the new unit while the boat was in the water) so I used the reducer. I was originally planning to "fix" this but it works so well I haven't been able to justify all the work. The white wire and fuel supply hose are normally zip tied up out of the way but I am doing some other work that is still in progress. The silver thing is our water heater.
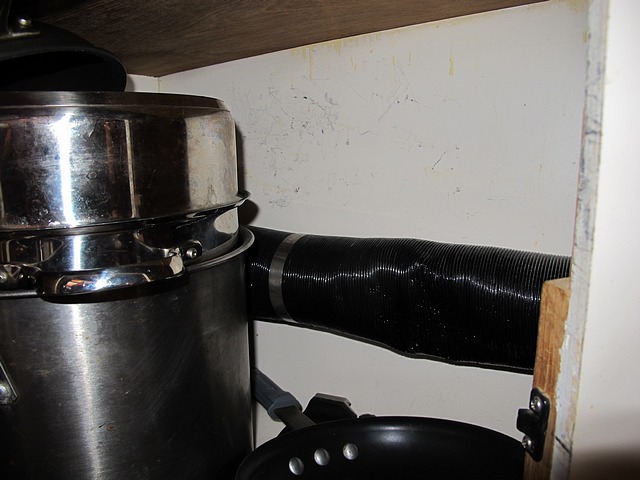
This shows the other side of the bulkhead where the duct runs through the pot locker. Unfortunately it does get abused in there. If I ever to decide to run a larger duct I will look for something a bit more durable.

This shows the duct running inside the locker under the dish storage.
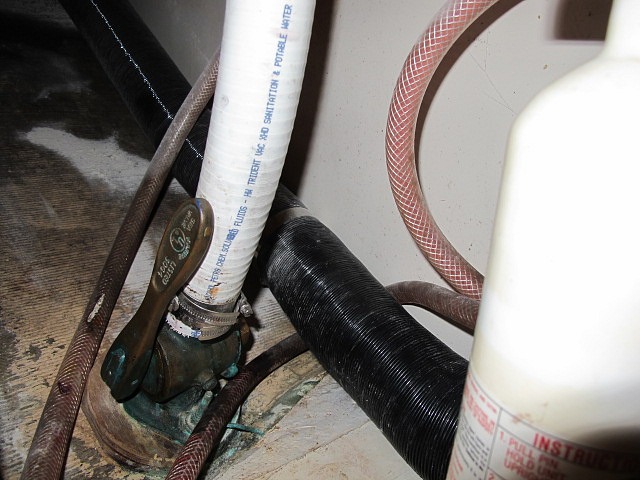
This is under the galley sink. There is a "Y" someplace that feeds this run. There is no good way to get a picture of the "Y".
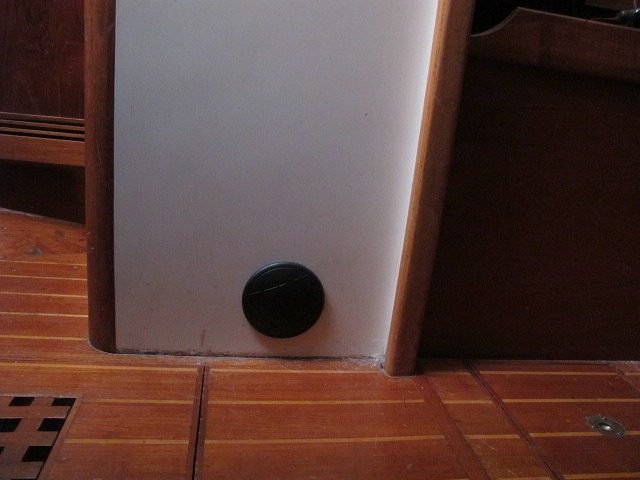
This is the only heat outlet in the main cabin. The run in the previous picture feeds this.
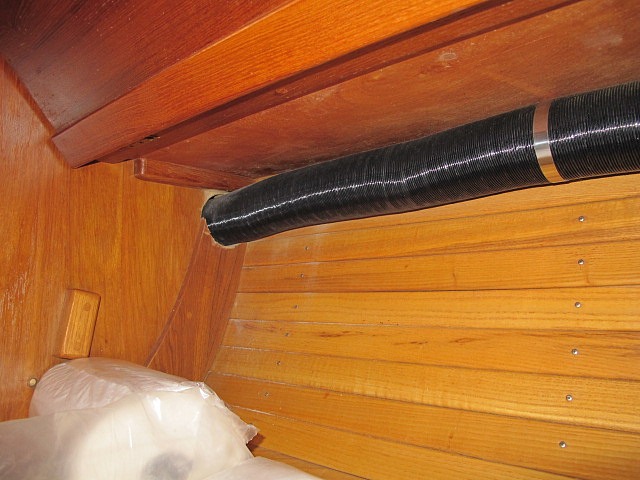
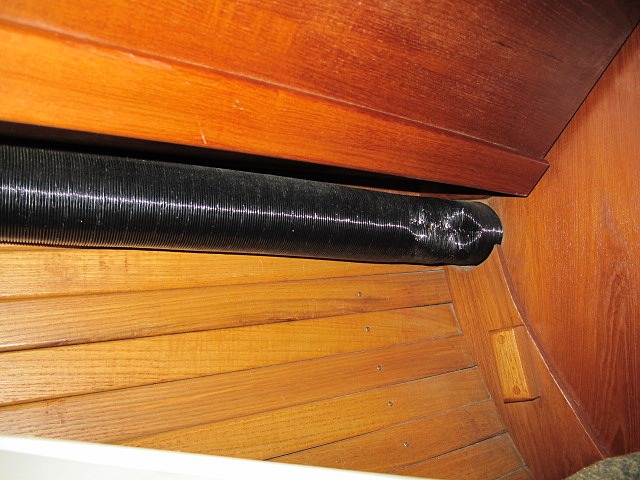
These two pictures show the duct work running forward through the main cabin behind the settee.
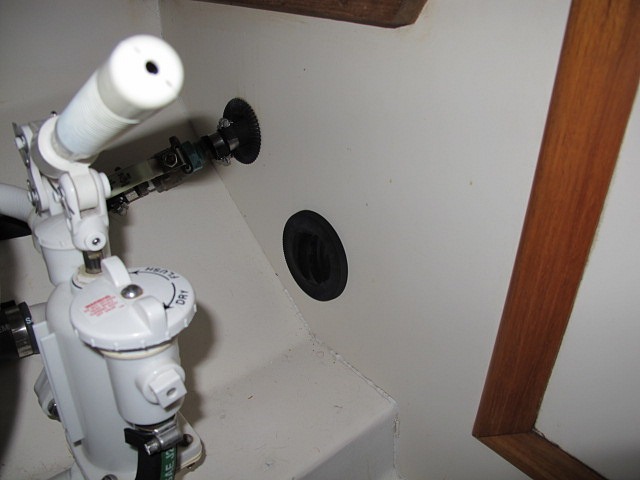
This is the heat outlet in the head.
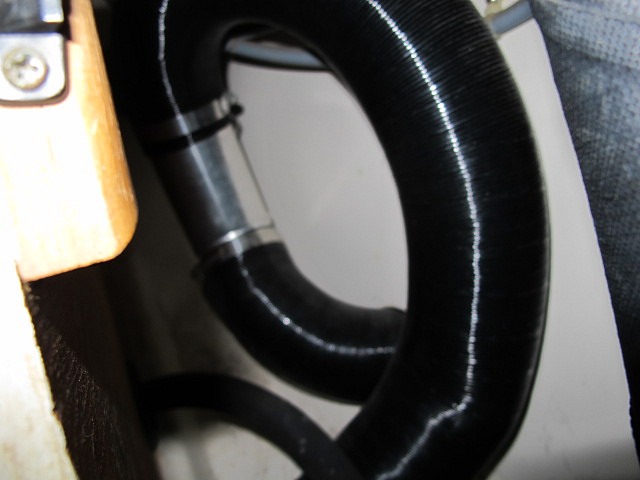
Duct work under the head sink. (Bad picture but about the best I could do.) It shows the last "Y". This "Y" is purposely installed backwards from what (at least for me) would seem appropriate. This was done on the recommendation of Ocean Options.
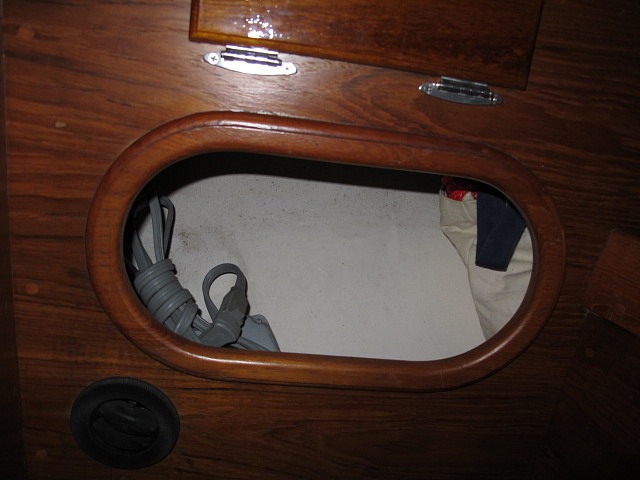
This is the final heat outlet. This is low in the "V" berth. All of the heat outlets are the same size although this picture makes it look smaller.
This is the main unit. The hot air duct is exiting to the right. Cold air comes in from the left. Exiting from the bottom are the hot exhaust and the burner air intake muffler. This is all mounted high in the port cockpit locker. The blue thing on the bottom is a battery box for 2 golf cart batteries. The wires were left a bit long because working in that compartment is no fun at all.
This shows the forward end of the main unit and the hot air duct. Note the reducer. When we installed this new unit the hot air duct is a larger size than we had on the old one. Ocean Options recommended running the larger size duct up to the first "Y". This wasn't really practical (I installed the new unit while the boat was in the water) so I used the reducer. I was originally planning to "fix" this but it works so well I haven't been able to justify all the work. The white wire and fuel supply hose are normally zip tied up out of the way but I am doing some other work that is still in progress. The silver thing is our water heater.
This shows the other side of the bulkhead where the duct runs through the pot locker. Unfortunately it does get abused in there. If I ever to decide to run a larger duct I will look for something a bit more durable.
This shows the duct running inside the locker under the dish storage.
This is under the galley sink. There is a "Y" someplace that feeds this run. There is no good way to get a picture of the "Y".
This is the only heat outlet in the main cabin. The run in the previous picture feeds this.
These two pictures show the duct work running forward through the main cabin behind the settee.
This is the heat outlet in the head.
Duct work under the head sink. (Bad picture but about the best I could do.) It shows the last "Y". This "Y" is purposely installed backwards from what (at least for me) would seem appropriate. This was done on the recommendation of Ocean Options.
This is the final heat outlet. This is low in the "V" berth. All of the heat outlets are the same size although this picture makes it look smaller.
Rich Abato
Nordic Tug 34 Tanuki
Previous Owner Of CD36 Mahalo #163
Southern Maine
http://www.sailmahalo.com
Nordic Tug 34 Tanuki
Previous Owner Of CD36 Mahalo #163
Southern Maine
http://www.sailmahalo.com
-
Randy Capstick
- Posts: 109
- Joined: Feb 6th, '05, 19:55
- Location: 1980 Ty Weekender, 1984 CD36 Glen Margaret, Nova Scotia, Canada
Re: Espar Heater in CD36 advice
Wow! Great pictures Rich.
Thanks so much,
Randy
Thanks so much,
Randy
Re: Espar Heater in CD36 advice
My d3l is bolted on the starboard side, just aft of the small access hatch in the starboard quarterbirth. One duct runs to the front of the motor mounts, blowing into the cabin at the base of the ladder. The exhaust runs aft. The thermostat is on the bulkhead next to the forward berth. It produces abundant heat. Amazing little device.
- Maine Moke
- Posts: 10
- Joined: Jul 17th, '15, 08:33
- Location: CD36 Irie #107
Re: Espar Heater in CD36 advice
Thanks for the pictures. Looking forward to having heat this summer in our boat.
MaineMoke
CD36 Irie
Biddeford, Maine
CD36 Irie
Biddeford, Maine
-
Randy Capstick
- Posts: 109
- Joined: Feb 6th, '05, 19:55
- Location: 1980 Ty Weekender, 1984 CD36 Glen Margaret, Nova Scotia, Canada
Re: Espar Heater in CD36 advice
Hi Rich,
I'm finally getting around to installing my espar heater and have another question for you. Does the hot exhaust from the heater exit your boat on the Port side or through the aft compartment and out through the transom?
Thanks, Randy
I'm finally getting around to installing my espar heater and have another question for you. Does the hot exhaust from the heater exit your boat on the Port side or through the aft compartment and out through the transom?
Thanks, Randy
- bottomscraper
- Posts: 1400
- Joined: Feb 5th, '05, 11:08
- Location: Previous Owner of CD36 Mahalo #163 1990
- Contact:
Re: Espar Heater in CD36 advice
The exhaust is high at the rear of the boat out through the transom.
You do not have the required permissions to view the files attached to this post.
Rich Abato
Nordic Tug 34 Tanuki
Previous Owner Of CD36 Mahalo #163
Southern Maine
http://www.sailmahalo.com
Nordic Tug 34 Tanuki
Previous Owner Of CD36 Mahalo #163
Southern Maine
http://www.sailmahalo.com
-
Randy Capstick
- Posts: 109
- Joined: Feb 6th, '05, 19:55
- Location: 1980 Ty Weekender, 1984 CD36 Glen Margaret, Nova Scotia, Canada
Re: Espar Heater in CD36 advice
Thanks Rich, I'll probably do the same.
Randy
Randy
- Joe CD MS 300
- Posts: 995
- Joined: Jul 5th, '05, 16:18
- Location: Cape Dory Motor Sailor 300 / "Quest" / Linekin Bay - Boothbay Harbor
Re: Espar Heater in CD36 advice
Randy the installation on our MS 300 is pretty similar to that on Mahalo. As I tend to launch pretty early in the season so it’s nice to have that heat on those spring mornings that are still in the low 40’s or even upper 30’s. It’s the only boat heat I have experienced, but I can’t think of a system that easier to use. The only issues I have had was at start up with the unit trying to start up but then shutting itself down. I think it draws a a fair amount of power firing up the burner. A new heavier gauge wire feeding the unit corrected the issue. You might want to up size the wires when you are doing the install.
Better to find humility before humility finds you.