Jim
Rebed Typhoon Bow Chock
Moderator: Jim Walsh
-
jim trandel

- Posts: 57
- Joined: Oct 13th, '09, 10:10
- Location: '83 Typhoon Weekender, #1907 "Second Wind" Chicago Monroe Harbor
Rebed Typhoon Bow Chock
Has any experience with removing and re-embedding the bow chock on a Typhoon? Help! 
Jim
Jim

Same here. The interior backup plate is mild steel and there is a major rust problem. Apply Kroil every day for about a week. Then apply heat and more Kroil. You also might want to crawl up into the bow and spray some Aerokroil on the underside of those bolts. You will still have to use an impact driver to remove those screws.
Last edited by sharkbait on May 12th, '11, 10:57, edited 1 time in total.
Have A Nice Day

I used to remove the screws for the Bow Chock and back stay bracket on my Typhoon Weekender once a year and then sprayed some WD40 into the holes at the advice of the dealer where I purchased it new. I owned it for over 26 years and never had a bit of problem. I have continued that practice with my CD25.
Greg Lutzow
Nokomis, FL
CD25
"Beau Soleil"
sailing off a mooring in Sarasota Bay
With nothin' but stillness as far as you please
An' the silly mirage stringin' islands an' seas.
Nokomis, FL
CD25
"Beau Soleil"
sailing off a mooring in Sarasota Bay
With nothin' but stillness as far as you please
An' the silly mirage stringin' islands an' seas.
-
jim trandel
- Posts: 57
- Joined: Oct 13th, '09, 10:10
- Location: '83 Typhoon Weekender, #1907 "Second Wind" Chicago Monroe Harbor
Got the s/s 6 bolts off without much difficulty using my trusty old brace but the stemhead fitting continues not to budge. I've put a heavy rubber mallet to it for 30 minutes and it appears to be bonded without bolts. Am I missing some assembly feature?
I am not going to pry it using leverage against the deck or hull in fear of damage to the deck or hull and I hate to just smear on 5200 to attempt sealing the fitting.
Jim
I am not going to pry it using leverage against the deck or hull in fear of damage to the deck or hull and I hate to just smear on 5200 to attempt sealing the fitting.
Jim
If it had S/S bolts then someone has removed it in the past. As far as I know they all came originally with bronze bolts. I would not be surprised if they bedded it in 5200 when they replaced it. There are solvents for 5200. You might want to apply some and see what the results are. I would not pry on it. If they bedded it in 5200 or even worse epoxy you would tear up the deck prying it off. If the solvent does not work then I would get a small flame torch and apply heat carefully.
When I replace mine I used bronze bolts but I drilled out the threads in the steel backing plate and used washers and nuts during the install.
Be extremely careful if you decide to drill out the threads. Some of the fasteners are very close to the outer edge of the hull.
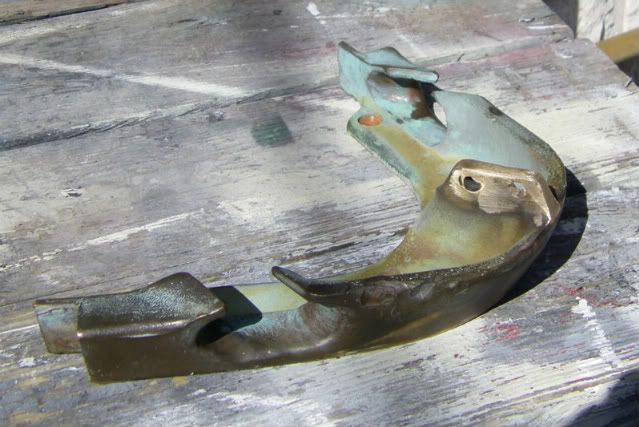
I had to remove mine because it was broken where the head stay attached. I found an artist who works in bronze who did a wonderful repair job.
When I replace mine I used bronze bolts but I drilled out the threads in the steel backing plate and used washers and nuts during the install.
Be extremely careful if you decide to drill out the threads. Some of the fasteners are very close to the outer edge of the hull.
I had to remove mine because it was broken where the head stay attached. I found an artist who works in bronze who did a wonderful repair job.
Have A Nice Day
-
Steve Laume

- Posts: 4127
- Joined: Feb 13th, '05, 20:40
- Location: Raven1984 Cape Dory 30C Hull #309Noank, CT
- Contact:
If it is epoxy or 5200 heat might be your best friend.
A heat gun on the bronze fitting will soften the sealant under it if held on there for some time. The softening solvents don't seem to penetrate very far under a well stuck piece of hardware so I wouldn't expect much from them. It might still be a good idea to squirt some under the edges before heating. The heat will not completely break the bond but will soften it enough so you can slide a thin blade under the stem fitting and pry a little.
One trick I have used for years is to slide two wide puddy knives under whatever I want to pry up. The pry bar is then inserted between the knives and the load is distributed over a broader area.
The good news is that you should not have to do this again for a very long time.
Just don't put it back with 5200, Steve.
-
jim trandel
- Posts: 57
- Joined: Oct 13th, '09, 10:10
- Location: '83 Typhoon Weekender, #1907 "Second Wind" Chicago Monroe Harbor
Thanks everyone for your help!
I'm going to apply heat with some more mechanical assist. I believe your right-on with the thought that this fixture has been removed in the past and improperly embedded with a "mystery" sealant. This area the source of my water intrusion and its got to get fixed before I launch this season!
Thanks again,
Jim