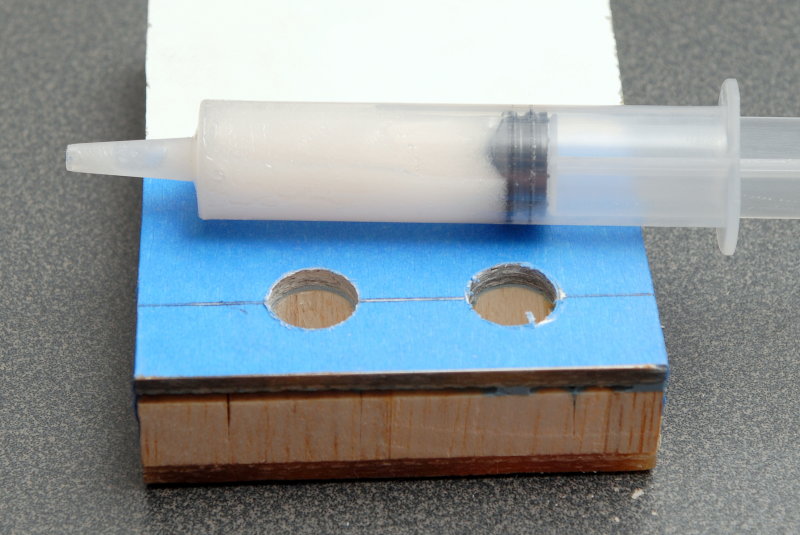
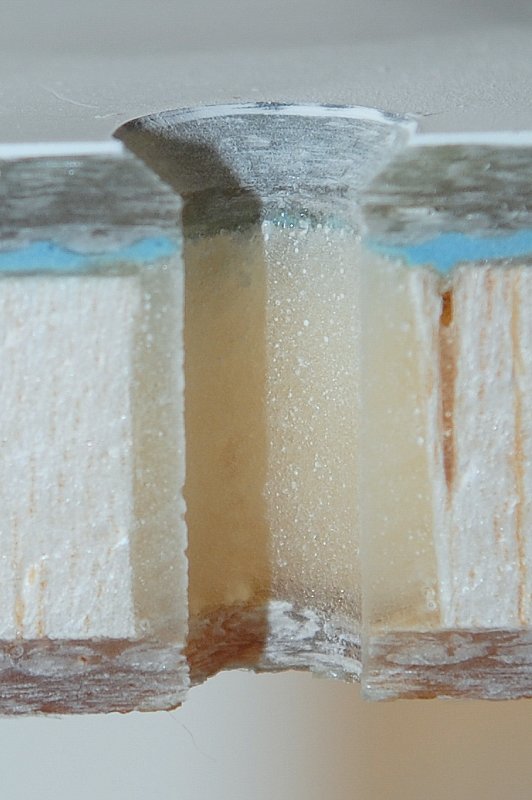
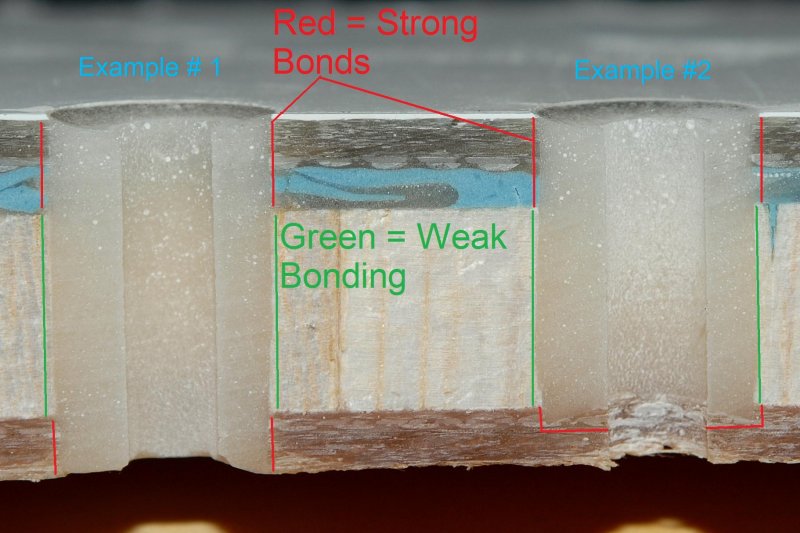
Troy Scott wrote:I do it a little bit differently. I don't remove the structural fiberglass on top. I incorporate a fiberglass backing plate into the structure. I drill the fastener hole first. Then I go to the bottom and start a new, larger hole using a hole saw, usually about 1" for a 1/4" fastener. I stop cutting with the hole saw as soon as I'm through glass on the bottom of the sandwich deck structure. Then I stop and pop the fiberglass off the bottom. Then I switch to a "bottom cutting bit" that cuts a nice clean cylinder. I cut with that until the balsa is completely gone and I've perfectly exposed the clean bottom of the upper, outer skin. Then I bond on an oversized fiberglass backing plate using an epoxy spooge. At this point I have a top skin and a nice, thick backing plate, but the space where the balsa and the lower skin was is now a hollow cylinder. I use a syringe to fill this cylinder with epoxy thickened with milled fiber. When this is all done the area all around and under the fastener is FRP. In most cases the base of a cleat will be about the size of this solid area.
I abbreviated the above plan to made it easier to follow. Actually, I incorporate a few additional steps. My backing plates are made from bought, prefabricated sheet fiberglass of various thicknesses. A large cleat will usually get a 1/2 inch thick FRP backing plate. A chainplate may get 3/4". A stancion base will get 1/4". I sand the area where I will bond on the backing plate. I "pre-seal" the exposed balsa with resin before I bond on the plate. If the hollow cylinder will be very large, I sometimes use the same holesaw to create thick FRP "washers" to partially fill the void. I use waxed "throwaway" mild-steel bolts and nuts to hold the backing plate under the deck while the initial spooge cures. I use the same length bolts so I can determine when the backing plate is parallel to the surface. Usually only one bolt will really be tight, and the others will be drawn up to match. I always do a "dry run" first so I will know exactly how it should be when I'm dealing with spooge. If I need the FRP "washers", I just slip them on the bolts before pushing the plate up into position. I still finish filling the cavity with resin in order to make sure I have a perfect seal and a sturdy, solid structure. This is a two step process, because filling the cavity takes place after the backing plate is cured and the bolts are removed. After removing the waxed bolts, I redrill very slightly larger to make sure I get rid of the wax residue. Then I use tape to seal the bolt holes from the bottom. I completely fill the cavity, and redrill the holes later. I countersink the top of the hole slightly to provide a place for bedding compound to do it's job. I don't tighten the fasteners at first. I draw them up almost completely, then, days later, finish tightening them. This way I don't squeeze all the bedding out.
I hope this helps somebody. It has worked well for me for many years.
Troy,
There are many ways to skin the cat! That's just one example of another good method. I have used a similar method using G-10. If only we had the access to get a drill and hole saw to all our bellow deck penetrations... I could probably get a drill and hole saw to about 80%, but not all, even with a right angle drill..
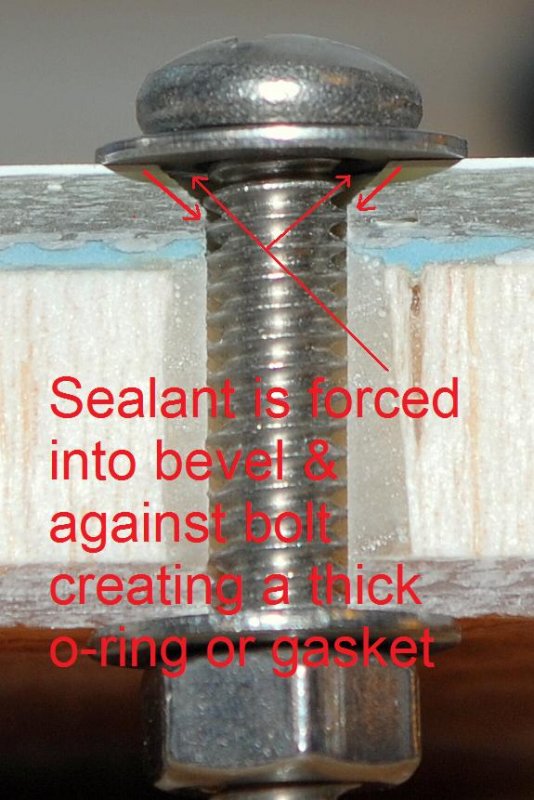
One thing of concern is your "gasket". Letting these marine sealants cure for days can create a failure at the bolt if it is twisted even slightly after cure.
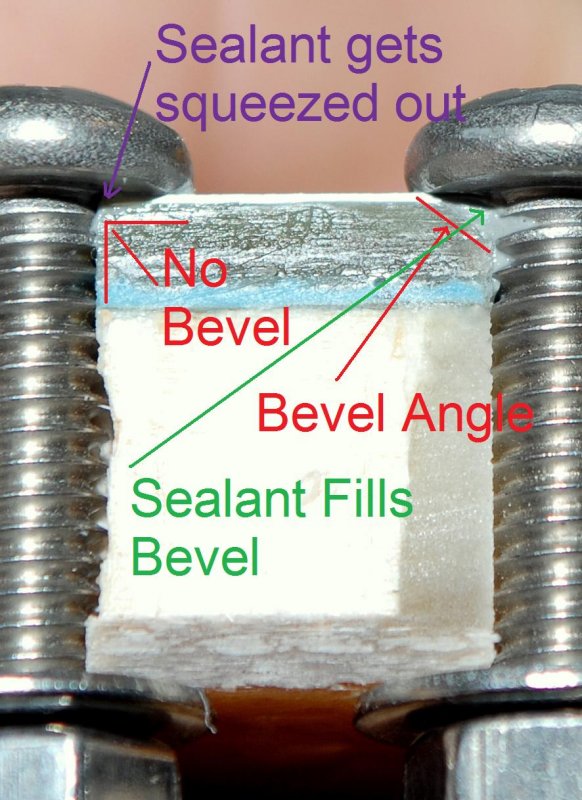
The other thing that can happen is compressive resistance of the marine sealant. This resistance can still leaves enough "gasket" for a piece of deck hardware to move slightly even with seemingly tight bolts. With a chamfer there is no need for using the Don Casey method and you can tighten that day all the way and be done.
I was also wondering how you clean the amine blush from the inside of the hole after you affix the backing plate but before injecting the filler? Do you use a no blush epoxy?
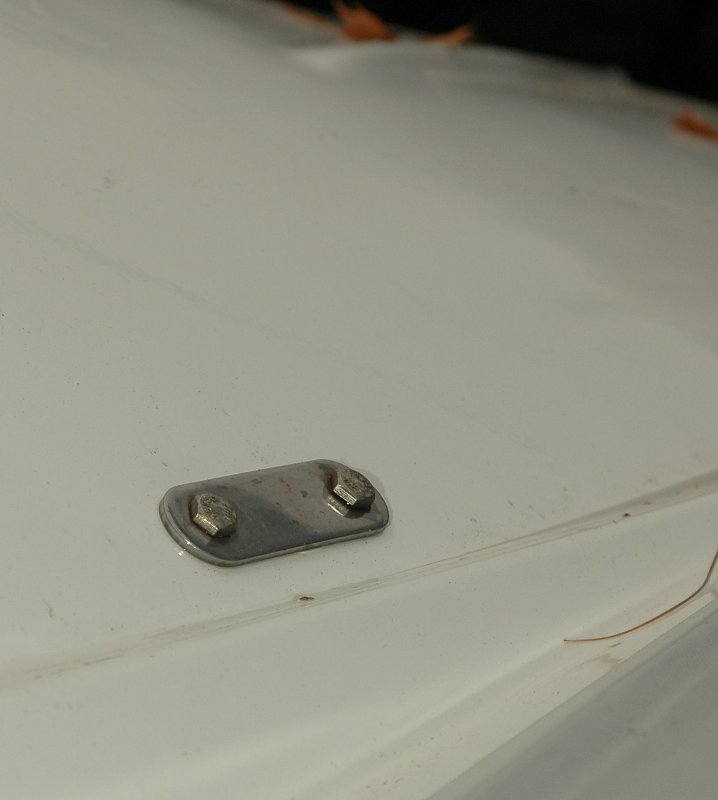
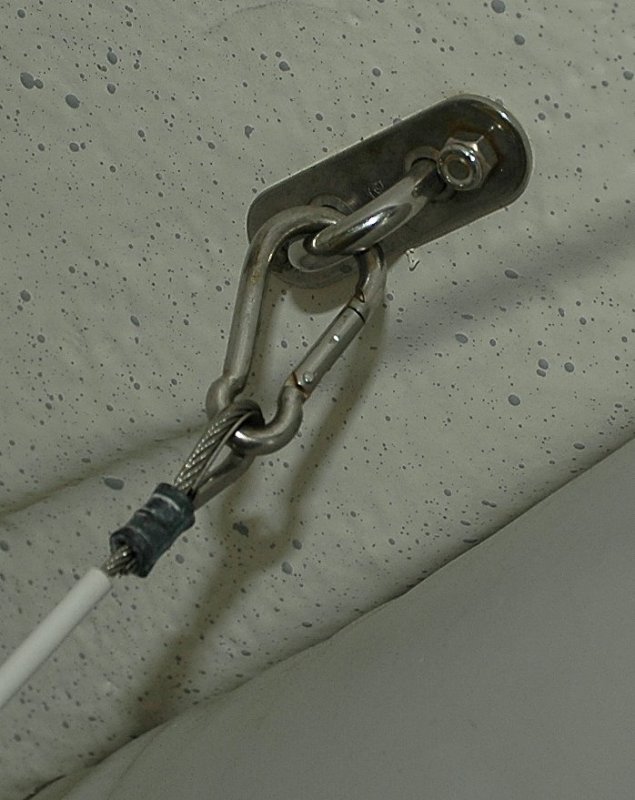
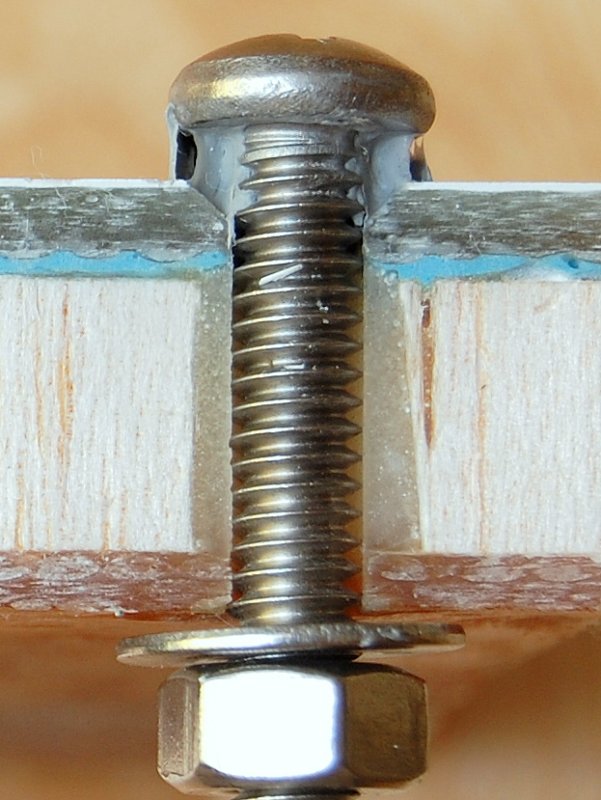
I present you the photo below. The photo is the lifting pad eye for my RIB. To bed it I used 3M 101 and tightened it immediately with a chamfered hole. I did not wait for it to set up or partially cure.
Forming a gasket or partial cure can lead to hardware movement and other associated problems because you can't always get the hardware tight enough against the deck due to compressive resistance if it has cured too much.
This lifting davit is BELOW the waterline and has been bone dry now for seven years even with the loads exerted while lifting it into & storing it on the davits. With a proper countersunk hole you do not need to let it partially cure. This photo is but one example of why you don't need to "form a gasket", all be it a good one, when you have also countersunk. Keep in mind this pad eye is submerged and deck hardware is not..

Below the waterline and tightened immediately!
