Cleaning the space between the hull and the ceiling strips
Moderator: Jim Walsh
-
Tom Keevil
- Posts: 452
- Joined: Feb 6th, '05, 23:45
- Location: Cape Dory 33 "Rover" Hull #66
Cleaning the space between the hull and the ceiling strips
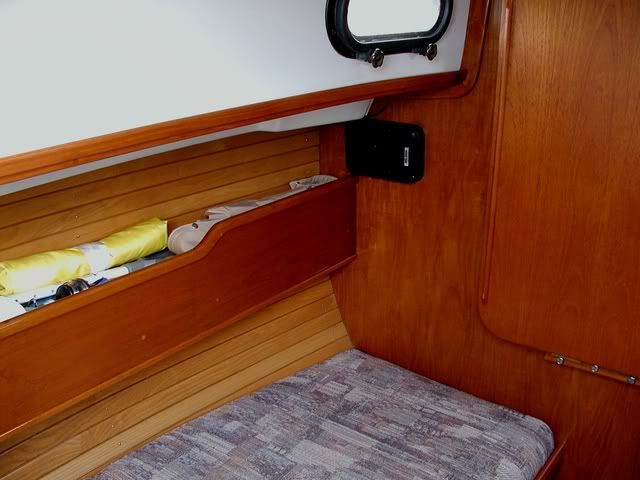
We have a suspicion that various undesirable life forms are happily established in the space between the hull and the ash ceiling strips of our CD 33, and that they may be responsible for certain undesirable odors that have appeared. Short of taking off all of those strips, has anyone found a good way to clean that space?
Tom and Jean Keevil
CD33 Rover
Ashland OR and Ladysmith, BC
CD33 Rover
Ashland OR and Ladysmith, BC
-
Parfait's Provider

- Posts: 764
- Joined: Feb 6th, '05, 13:06
- Location: CD/36 #84, Parfait, Raleigh, NC
berthed Whortonsville, NC
A mini-powerwasher?
If you are trying to dislodge and kill mildew back there it seems to me that it is going to take lots of chlorine and scrubbing. Maybe you can do it by only removing every second or third plank, but you will still need some pressure behind the applicator.
Keep on sailing,
Ken Coit, ND7N
CD/36 #84
Parfait
Raleigh, NC
Ken Coit, ND7N
CD/36 #84
Parfait
Raleigh, NC
-
Steve Laume

- Posts: 4127
- Joined: Feb 13th, '05, 20:40
- Location: Raven1984 Cape Dory 30C Hull #309Noank, CT
- Contact:
As that old shave cream ad used to say: take em off, take em all off. Or something like that.
I have taken every strip of ash off Raven except the ones they put in under the the screwed in book shelves. I wanted to get them off to refinish them. The ash looked very dark and dull. It is such a beautiful, light wood when freshly finished. I also wanted to insulate for sound and temperature in that area.
I did the vee berth area one year and the main cabin the next. I have learned a few things in the process. First of all is to pitch all the old slotted screws and buy a new box of stainless, philips headed ones to put things back together. You can use an electric screw driver if you want but you will need a little finger driver for a few of the screws that are hard to get at. I numbered, marked port and starboard, forward and up arrows on the back of each piece with a permanent maker. Now you can take all the strips home to clean, sand and finish all surfaces with a film type finish of your choice so they will stay nice and will not harbor moisture and mildew. You are also free to clean the liner behind them.
I insulated the spaces between the attachment ribs with foil faced bubble wrap insulation, foil taped at the seams. When I did the vee berth area I sanded the edges of the strips just enough that the shinny foil shows in places. This has a disturbing effect for some reason. When I did the main cabin I was careful not to sand edges. I also got some black landscape fabric and covered the foil before I put the wood back on. I will redo the vee berth with landscape fabric this winter but it will be oh so much easier with the phillips heads.
I guess what I am saying is there is no easy way around this and it is not that hard. You will know things are clean back there. Even if you could clean the liner you wouldn't be able to clean the back of the strips. Once the ash is refinished you will wonder how you ever lived with it the way it was. It is kind of a nice winter project to have the strips home and another reason to get down to the boat once in a while.
Remember, phillips heads, Steve.
another screw option to consider...
square drive, available in bronze or stainless...
http://www.jamestowndistributors.com/us ... atch_type=
[img]http://www.jamestowndistributors.com/us ... 000052.jpg[/img]
http://www.jamestowndistributors.com/us ... atch_type=
[img]http://www.jamestowndistributors.com/us ... 000052.jpg[/img]
The screws for the ash ceiling are #4 x 5/8" OHP, at least thats what I used to install after removal and refinishing. All the strips on my boat were numbered and marked P or S from the factory. I also used the bubble type insulation,- I think it helps cut down on condensation.
Take care when re-installing the screws , the liner holes will easily strip.
I used a ratchet type driver that had a good 'feel'. I did strip a few and went to a #6 screw and ground the head to a #4 size. Somewhat tedious, many screws. My ceiling had many coats of Cetol.....with bugs and dog hair mixed in, it looked awful. What an improvement after stripping and finishing with 3 coats Helmsmen satin. No sanding necessary , after stripping wash down with solvent using a red scotchbrite pad, then do it again with clean rags and finish.
________
IOS GAMES
Last edited by Ron M. on Feb 11th, '11, 05:56, edited 1 time in total.
-
tartansailor

- Posts: 1526
- Joined: Aug 30th, '05, 13:55
- Location: CD25, Renaissance, Milton, DE
Eliminating Mildew
Tom,
You mocked my previous chlorine / hydrogen peroxide recommendation for sanitizing water tanks, perhaps this proven
remedy will change your mind.
Set out 4 to 6 pails filled with 2" of vinegar. Now button up the boat as tight as you can.
Refresh vinegar weekly.
The end game is when the black spots turn gray/white.
1,000 + Airstream travel trailer owners can't all be wrong.
And the beauty is you do not have to tear things apart.
Dick
Last edited by tartansailor on Sep 19th, '08, 12:15, edited 1 time in total.
ceiling finish to avoid mildew
According to two very knowledgeable people (Charlie Jones-boatbuilder and former liveaboard cruiser, and Rachel, current liveaboard who works at a boatyard), unlike satin, glossy varnish doesn't grow mildew...
Link to the discussion here:
http://bbs.trailersailor.com/forums/tra ... ead=653464
Link to the discussion here:
http://bbs.trailersailor.com/forums/tra ... ead=653464
-
Andy Denmark
- Posts: 630
- Joined: Feb 5th, '05, 11:38
ash ceiling strips - finish
When I enlarged the berths on Rhiannon I added ceiling strips to the sides as a continuation of the strips above the shelves. To keep from having a marked difference in appearance between the ones above and the ones below the shelving I refinished them all the same way -- sanded w/ 80 grit followed by 120, 2 coats of Interlux 1026 primer and 2 coats of Interlux #60 Rubbed Effect Varnish. These were finished front and back. I also replaced the slotted screws with Phillips heads.
On reinstalling the strips I noticed contrast in the occasional spaces between them from the stark white fiberglass behind. After scratching my head a bit I removed the strips and painted the area behind with one coat of primer and 2 coats of Mast Buff with mildew inhibitor additive. This solved the visual problem and evidently stopped the mildew as there is none obvious, by sight or smell, any more.
Let me see if I remember how to attach a pix ---
________
[url=http://juggalos.org/]JUGALLETTE
On reinstalling the strips I noticed contrast in the occasional spaces between them from the stark white fiberglass behind. After scratching my head a bit I removed the strips and painted the area behind with one coat of primer and 2 coats of Mast Buff with mildew inhibitor additive. This solved the visual problem and evidently stopped the mildew as there is none obvious, by sight or smell, any more.
Let me see if I remember how to attach a pix ---

________
[url=http://juggalos.org/]JUGALLETTE